Starting a blog in 2025 can feel a little scary. There are a million tutorials, a million opinions, and it’s easy to wonder to yourself if it’s even worth it anymore. So much of the information out there is outdated. Is blogging still even relevant? Can you STILL make money from it?
I get it.
I started blogging 12 years ago as a simple way to save me time responding to friends questions in bulk because I was getting so many of the same questions. I was just trying to be a good steward of time.
But that little blog was password-protected and only given to my friends. They started sharing the password, unbeknownst to me, and eventually I took the password off, opened it up to the world, and turned it into an 8-figure business over the years! 😮
Sometimes, we don’t know God’s plan. Sometimes, we have no clue how much we’re capable of until we try. 💪🥰
And after having done everything under the sun from network marketing, affiliate marketing, selling at craft shows, ecommerce, and everything else for the last 28+ years, I still believe blogging is one of the two best ways to earn an income from home while helping people (the other is creating your own digital products).
Blogging for beginners is a fantastic way to write about things that you are passionate about, help other people with the knowledge that you have, all while simultaneously earning an income from home. Before I started blogging, I had no clue it could be so profitable.
But, setting up a blog can be overwhelming if you have never done it before (and if you are not technically inclined). In this post, I will make it so easy to create a blog, you’ll wonder why you’ve not done it before. Between my step-by-step video tutorial to all the screenshots walking you through it, you will have no trouble setting up your own blog. And the best news is, that it costs VERY LITTLE to begin!
How to Start a Money Making Blog in 2025 (Even If You’re Not Techy)
Ready to start a blog site of your OWN?
To get started, I’ll walk you through these steps of how to start a blog from home to make it much easier for you.
Is Blogging Still Worth It in 2025?
Blogging has changed over the years for sure, but it is not dead.
In 2025, search engines, Pinterest, and email are still sending traffic to blogs like mine every single day and building a real, genuine community of like-minded people is more important now than ever (in light of new AI technology).
I’ve been making money online for nearly three decades now, and my blog is a major core part of my income. The key is to start NOW so you don’t waste a bunch of time on the fence, treat it like a real business (because it is), and build it around your time with your family and church.
Getting a Hosting Account
In order to have a blog, you need a host for your website, someone that allows you to rent a space on the internet (think of it like leasing or buying land to build a house on). A good host can make or break your blog.
Now keep in mind, there are a few free sites where they will host your blog for you, like Blogger, but I make way too much money every month in coaching when people come to me and want to switch from Blogger to WordPress, so best to do yourself a favor and start out RIGHT!
With the free sites that host for you, you will not solely own your blog and will not have as much control over it. Some free sites also do not permit web ads. If you plan on growing your blog into a business (how to start a blog and make money from it), want better traffic and SEO options (SEO is basically the way to get more traffic), it is essential to have a self-hosted site.
I recommend using the host site Bluehost (blog hosting for beginners):
Purchasing a Domain Name
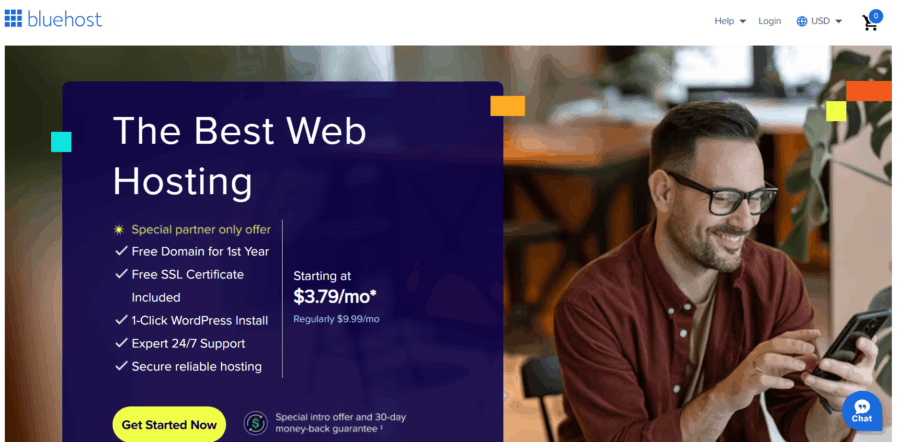
You are going to want to start by going to the Bluehost webpage. You can access it by clicking here or by typing https://www.sarahtitus.com/bluehost into your browser.
After clicking through, this is what you’ll see:
Ready to sign up? Consider this your beginner’s guide to blogging. Starting a blog is super easy and literally takes less than 5 minutes to do. Click here to get the best deal available online when you take that step, along with a full tutorial and video to help you get started. Please note: this low offer is the absolute lowest pricing they offer online. I wish it were this cheap when I started MY blog!
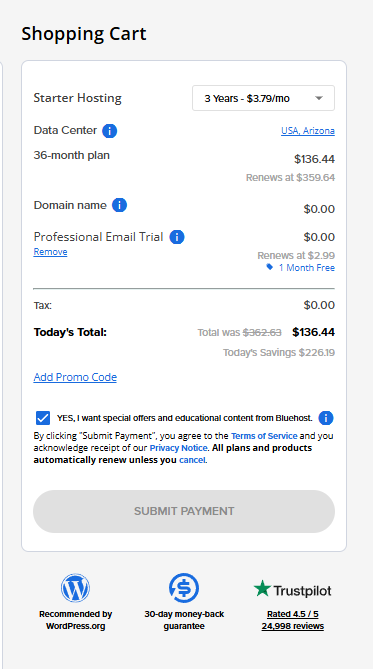
Right now, you can get hosting as low at $3.79/month! They have you pay upfront and yes, you absolutely WANT to do that, so you don’t lose your domain name forever. It’s yours and no one can take it from you for as long as you purchase it in advance (I have 12 years on SarahTitus.com!)
The pricing is as follows:
- $3.79 for 36 months –> $136.44 (so cheap seriously! I pay almost that yearly cost for ONE month on my blog now because my blog is so big, so this is a GREAT deal!)
- $4.79 for 12 months –> $57.48 (great deal)
- $15.99 monthly –> I wouldn’t recommend this one because I see no point in starting up a blog if you’re not committed to doing it long term. Better to pay less now all at once.
Remember that you MUST click HERE in order to get this special deal and I’m not just saying that. Do your homework. The deal isn’t available everywhere. They’ve given me special pricing for a limited time to pass on to you!
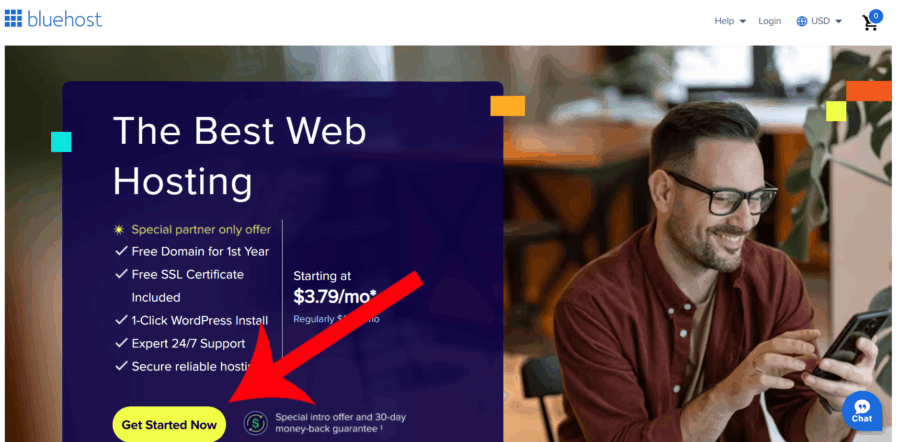
Then….click the yellow “Get Started Now” button.
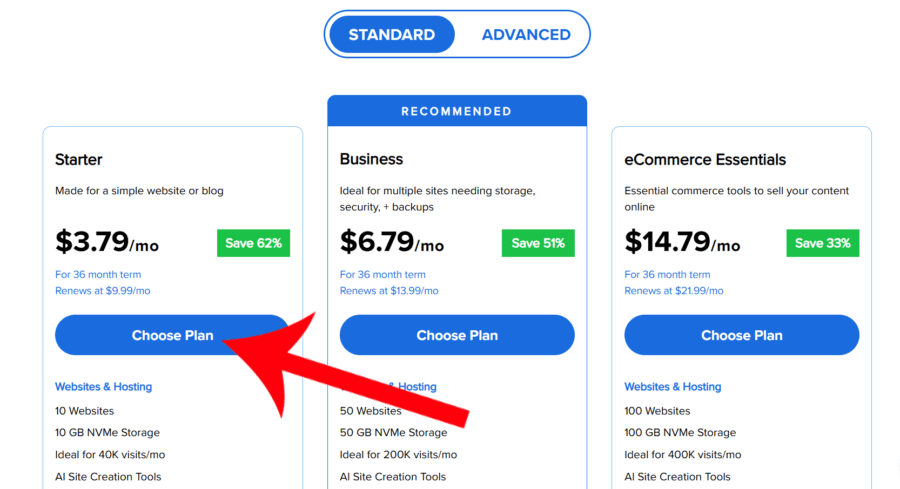
The first page it will take you to is the plan selection page as shown below.
Here is where you will decide which hosting option is the best for you. If you are just starting out, you will probably want to go with the starter or the plus plan. The starter plan is the least expensive because the longer you sign up for, the better deal you get. You will pay upfront, but again remember, no questions asked and you get your money back from them. They are not a hassle at all if you need to do so from what I’ve heard directly from Bluehost.
If you already have a blog that you are moving over from WordPress or Blogger, you might need to go with one of the larger plans as you’ll have more content and need more resources. But for this tutorial, I’ll assume you are new to blogging and continue walking you through it with that option in mind (the starter plan).
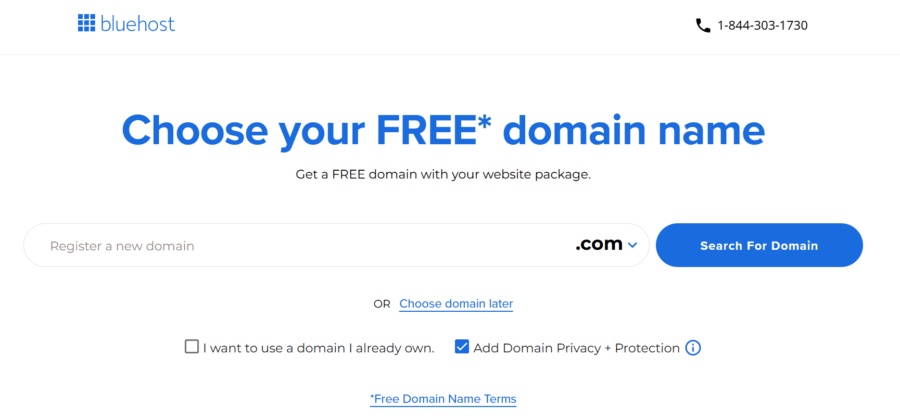
Your next step is to choose your domain.
The domain is the name of your site, or in my case, the SarahTitus in www.SarahTitus.com. Take a lot of time and thought with naming your blog. It will be the first thing people see for your site, and it will be what people use to look for you online.
It is best to avoid weird spellings because of this and I almost always recommend it be your first and last name (unless it’s incredibly hard to spell–otherwise, your name is best because you will no-doubtedly change the direction of your blog a few times before really getting a sense of your final direction).
Even after a year and a half of blogging, I just changed my direction as well. Bloggers are always growing and evolving (for lack of a better word). But chose carefully as this will become the name of your brand and what you are most known for.
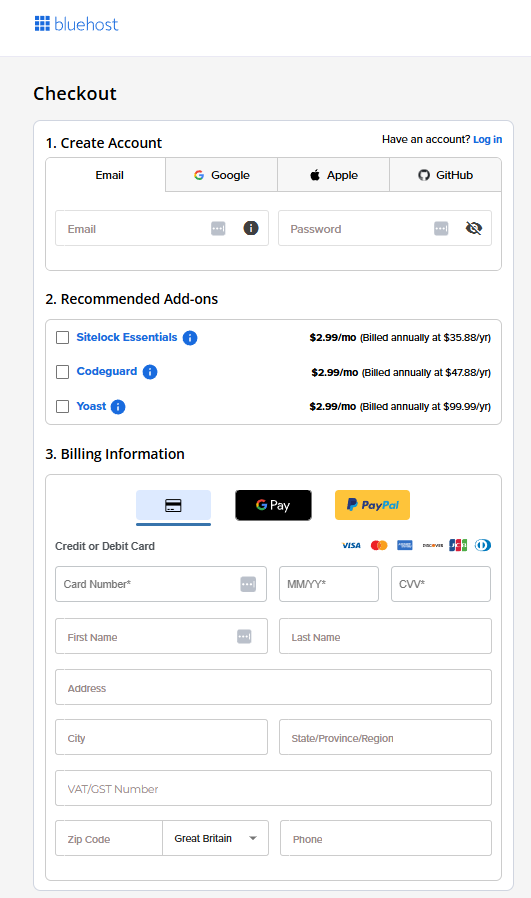
Next, you will fill in your personal information.
You will then select your package plan.
Purchasing hosting service longer is less expensive. This is your best option, because even if you do decide to cancel, Bluehost will refund your money for all of the months of hosting you did not use. The one extra feature that is mandatory you’ll want to select is domain privacy.
This will prevent your new site and email from spam as well as preventing everyone online to be able to SEE YOUR ADDRESS AND PHONE NUMBER!!! For your own privacy, it’s a really good idea to keep that stuff private. Where this wouldn’t apply is say a business like JC Penney or Macy’s. Obviously, they want people to know their address and phone number.
I’d also recommend Site Backup Pro. As you’re setting up your blog, if something should happen, you will lose all your work if you are not have routine site backups. Think of this like your computer backups that save routinely. I have my blog save every single day! Should something ever happen, I can restore to the last save and not lose all my hard work.
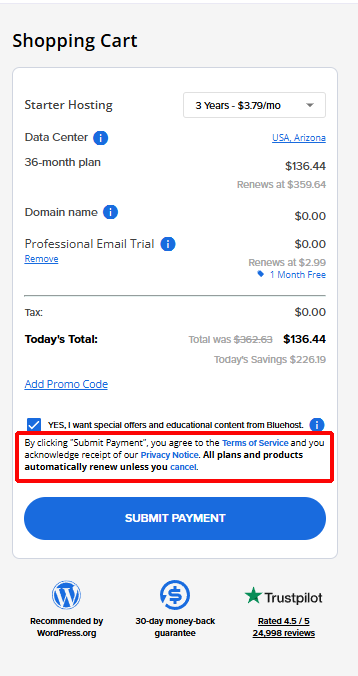
Then, once all your details and payment information have been entered, and you’ve selected your plan, you are ready to make the payment. Be sure to read the Terms of Service and Privacy Notice before you click the blue “Submit Payment” button.
And congratulations! You now have a hosting account!!!!
Setting Up Your Hosting Account
The next step you’ll want to do is to install WordPress on your site. Think of this like the building frame to your home that you put on your land.
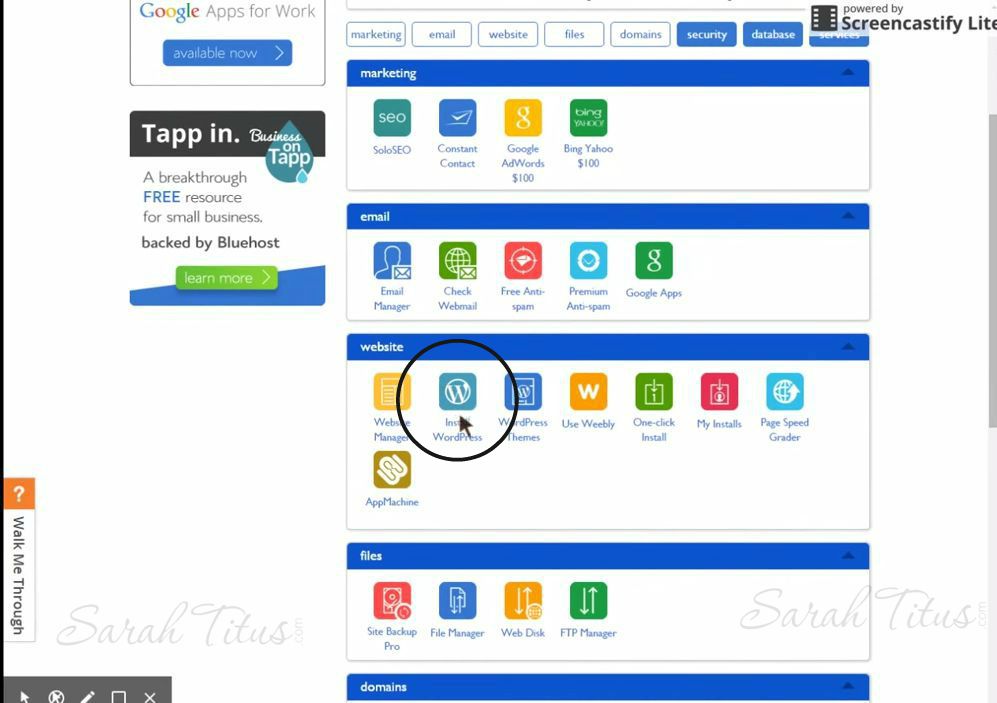
You can do this very easily on your Bluehost dashboard!
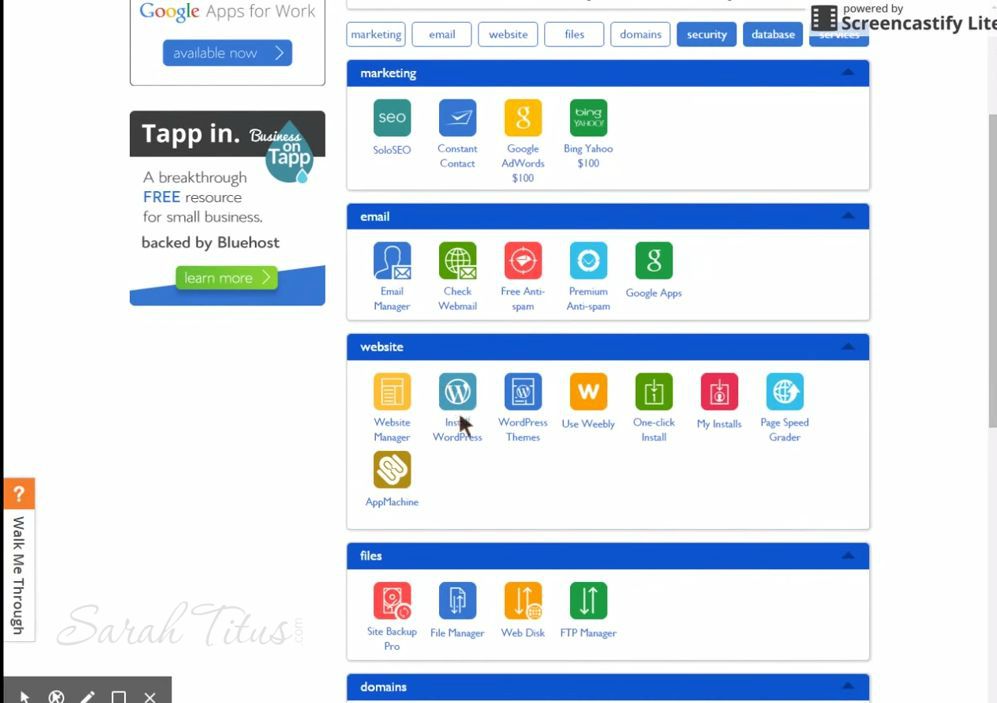
Immediately after clicking submit above, it will take you to your Bluehost dashboard. It will look like this:
*Your screens may look slightly different because WordPress and Bluehost update their dashboards often, but the steps are the same.
Installing WordPress on Your Blog
And you will want to scroll down to “website” and click “Install WordPress.”
That will walk you through the steps to install WordPress to your blog. It will take a few minutes to load and the voila! You have WordPress!
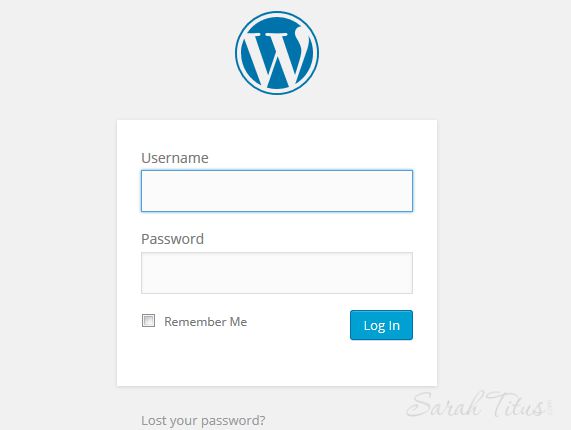
From here, you will be able to login to your blog directly on WordPress. Your login page will be yourblogname.com/wp-admin. You can type that in to get to your login page!
The home screen when you want to log in to your site will look like this:
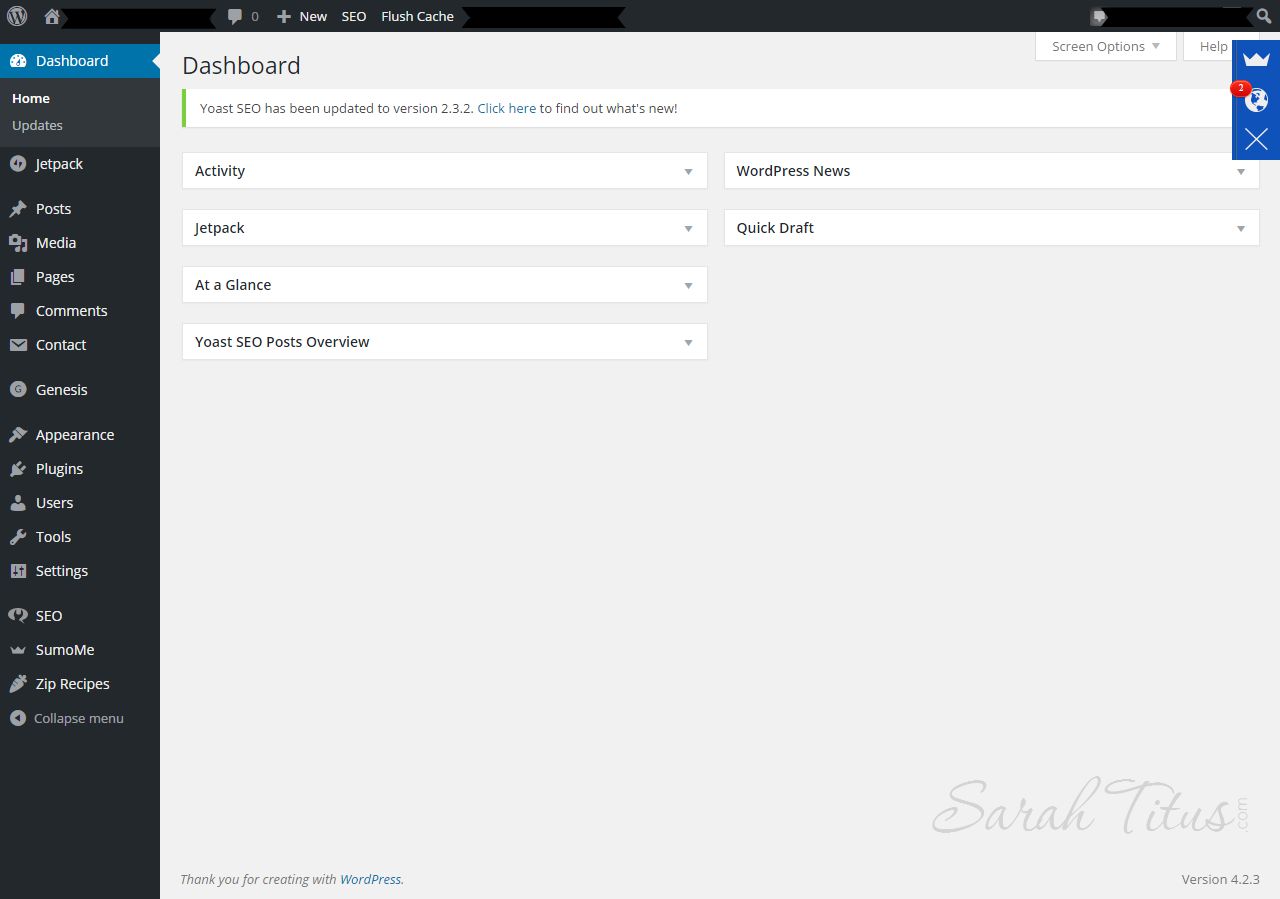
After you login, the next page it will take you to, will be your site’s dashboard.
Your dashboard will be the place you spend the most time. It is where you will write, edit, and craft all of your blog posts.
Want help staying organized as a brand-new blogger?
Once your blog is set up, the next step is staying consistent and not getting overwhelmed by all the tasks you need to do. You need to know exactly WHAT to focus your energy on and what to leave on the table.
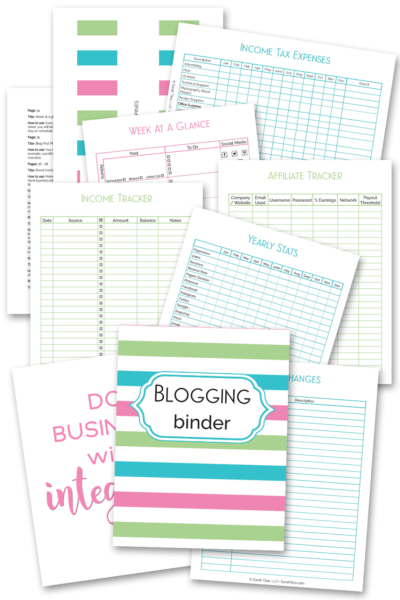
That’s exactly why I created my Blogging Binder {180+ Pages}. It’s a super cute, printable system that helps you:
- Track your posts, ideas, and income
- Plan your content and promotions
- Keep all your blogging details in one calm, organized place
If you’re serious about turning your blog into income, this binder will be your new best friend. ❤️
Picking and Installing a Theme That’s Right For You
If you want to start making money from your blog, which is why I assume you are setting up a blog with a hosting site, you will want to grab Genesis and a child theme. You do NOT want to go with a free theme. A lot of people have changed to different platforms such as Cadence and that’s okay, but I’ve been using Genesis for a REALLY long time, I STILL use it, and I STILL love it to pieces!
In fact, once you get Genesis and a child theme, be sure to go back and delete all the other themes on your blog. A very popular hack is getting in through those freebie themes.
You can get Genesis by clicking here and requesting it. For a child theme, you can purchase any one you want, but I highly recommend paying for it for many reasons. My favorite child themes are:
Think of the child theme and Genesis like the walls in your new home. After that, you are completely set. If you want plumbing and electricity, think of those as plug ins. Anything you want to do on your blog is possible with the right plug in. Just don’t install too many as they suck up resources and make your site run slower.
Creating Your First Post
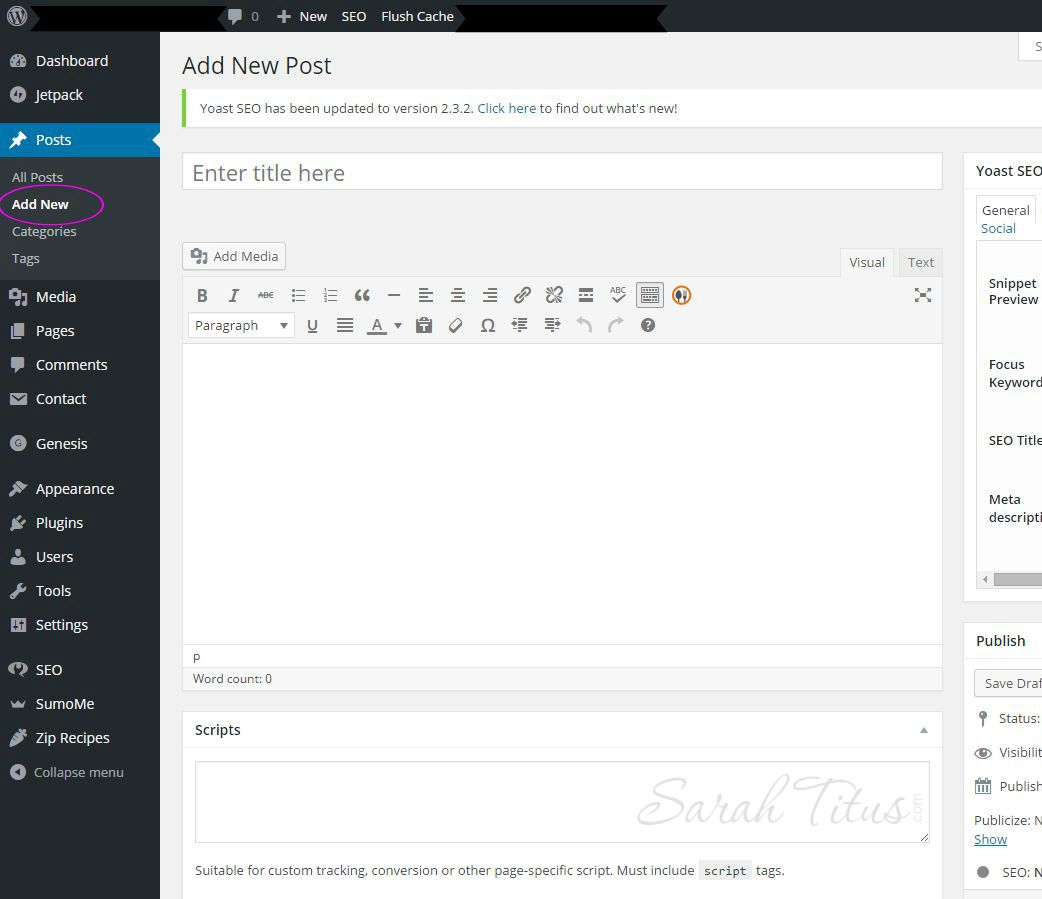
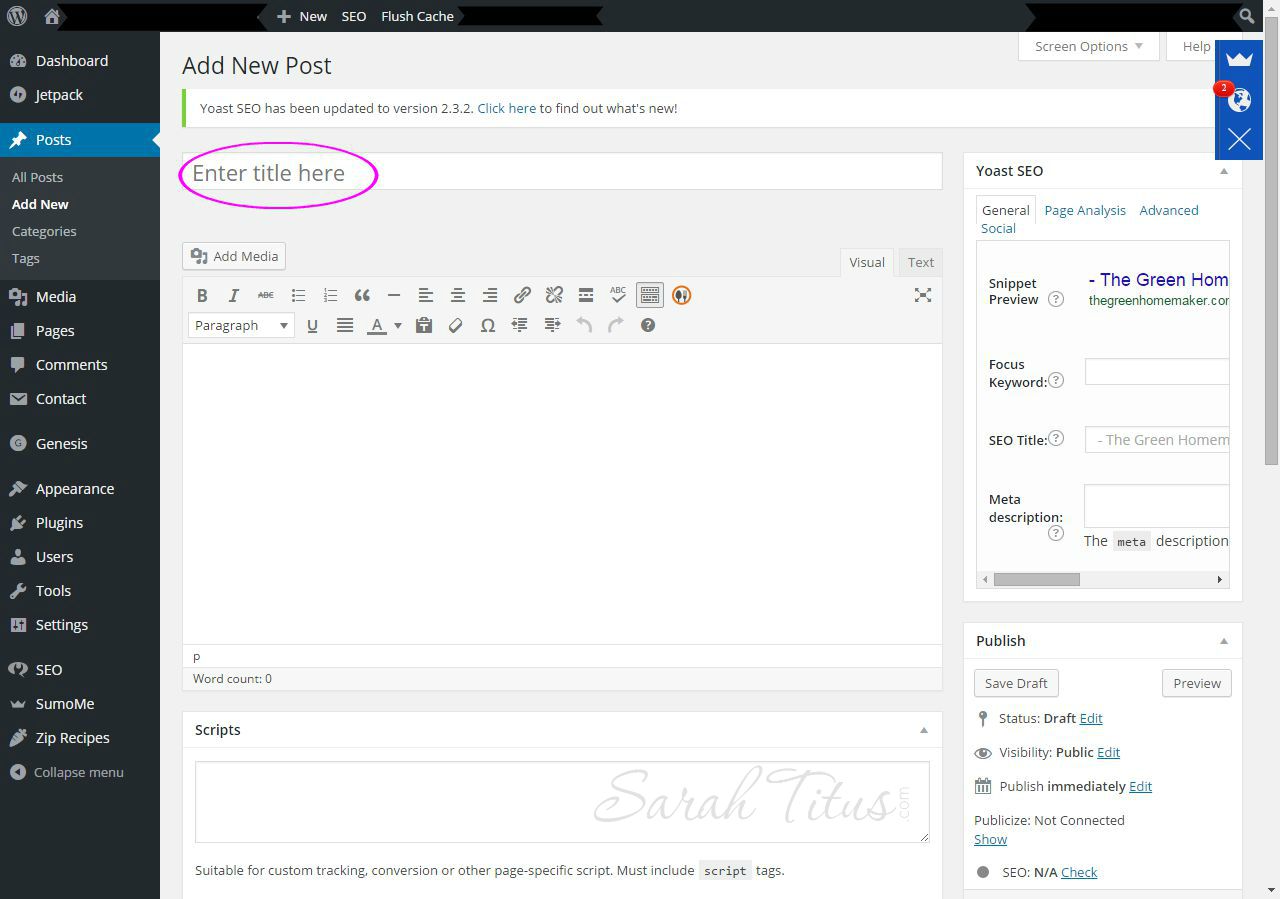
To start a post, you simply go to the left side bar and find “Posts.” Under that it will say “Add New.”
This is where you will do your writing/editing/blog work. There is a spot for the title of your post
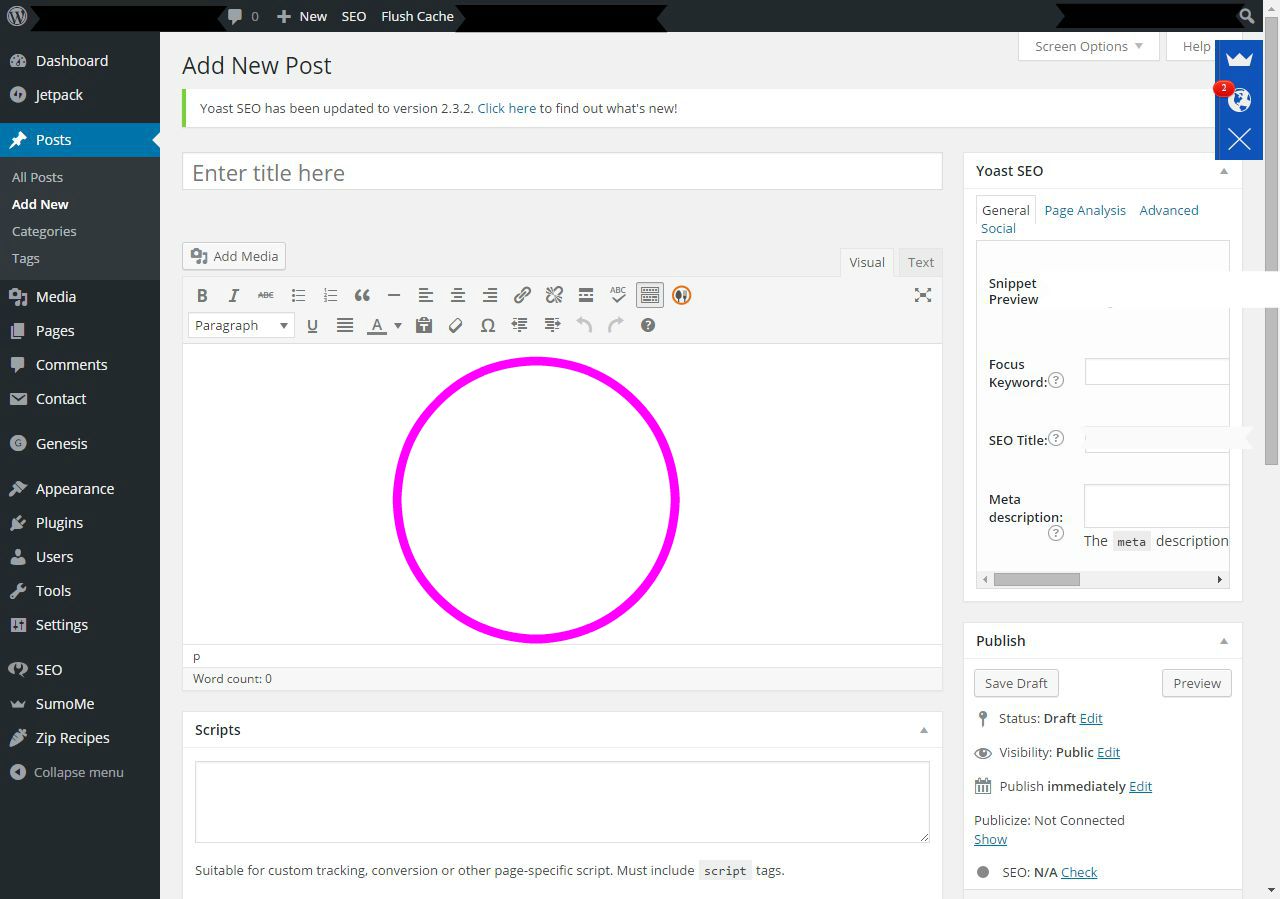
And the body is below that. That is where the actual content of your post will go.
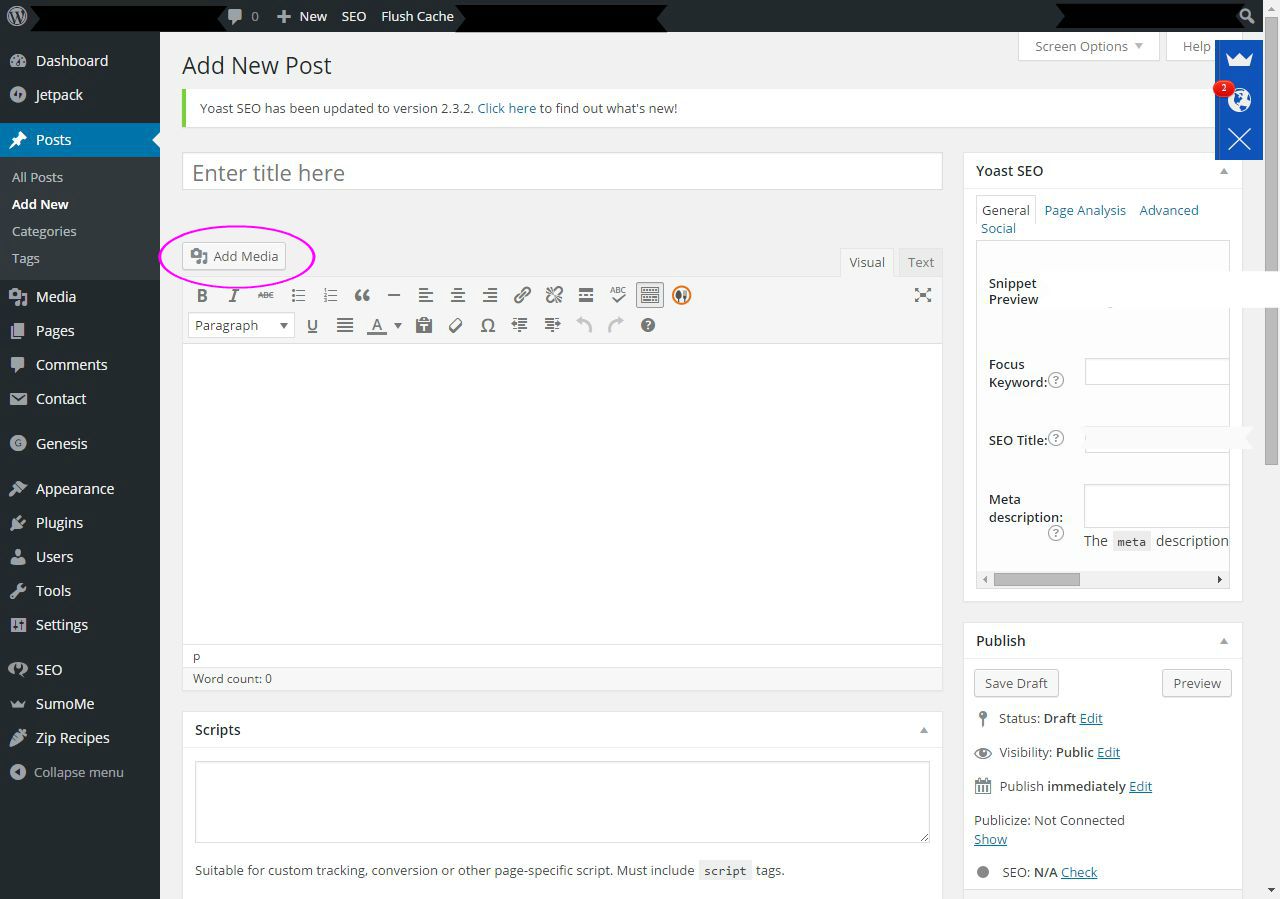
Most bloggers now have pictures in their posts. These are good to have so readers can pin your post to Pinterest. To add a photo to your blog post, go to “Add Media” above the body.
Where to Get Pictures for Your Blog
And from there, you can upload pictures from your computer to your blog post. Make sure to always give credit where credit is due for the images you use if you are using free images from a site that allows you to use their photos.
Here’s one popular site that offers free photos. I would highly suggest, as soon as you are possibly able to, to purchase a picture subscription as pictures are super important on a blog. Here’s the company (IngImage) I’ve gone through for a long time and absolutely adore them! They don’t require attribution, which is major in my opinion.
How to Schedule a Post
When you are done with the post, you can either publish your post right away, or you can schedule it to go out on another day and time of your choosing.
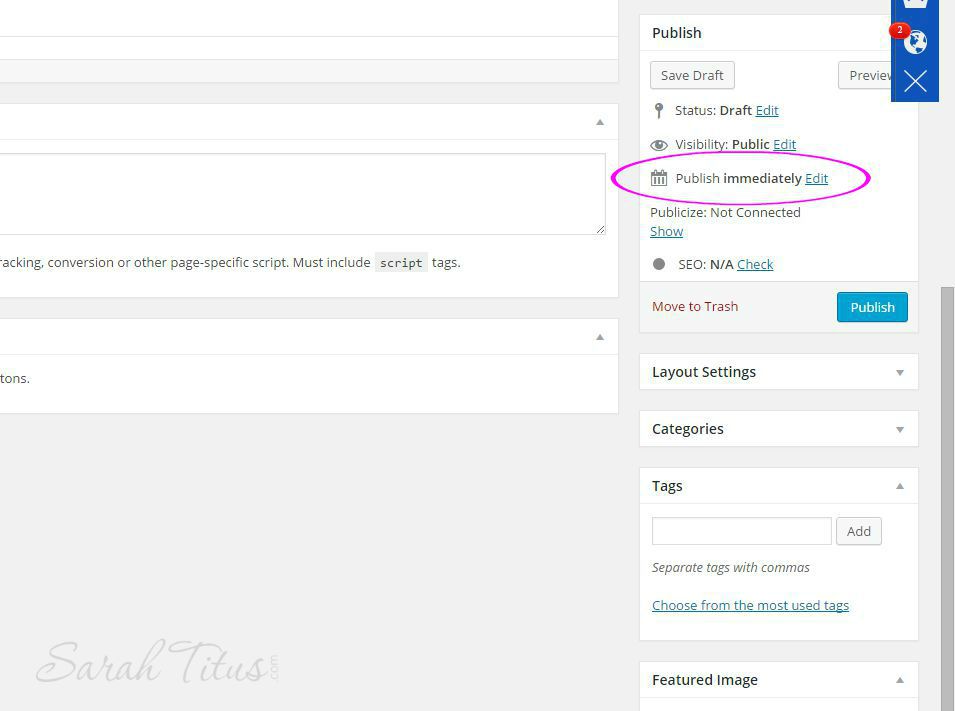
To schedule your post, you will want to go to “Publish immediately” in the right sidebar under “Publish,” and then click “edit.” From there, you will be able to set the time and date for your post to be published.
To publish your post immediately, you will just hit the blue “Publish” button.
And that’s it! You are now on your way to writing your very own blog! It can seem overwhelming and difficult at first. Take your time and get to know your WordPress Dashboard.
Use YouTube video’s to research things and as always, come back here often to see more blogging tips and tutorials! Once you know where everything is, writing and editing on your site will not be difficult at all, and you can focus on getting your awesome content out there and building traffic to make money online, which we can cover at a later date.
Ready to grow faster with a proven blogging system?
If you want to skip a lot of trial and error, check out my Honest Bloggers Bundle.
Inside you’ll get:
- My full Blogging Binder
- Extra binders and planners to track your stats and content
- Multiple books on making money blogging by working fewer hours (working smart)
- A huge library of styled stock photos for your blog to get started right out the gate
It’s created for women who want to build an online income without sacrificing their integrity, their family, or their peace! 🥰
Be sure to also check out these amazing posts…
- How I Started Making $10,000/Month My First Year Blogging (perfect social proof + motivation)
- How I Started Making Over $23,000/m My Second Year Blogging (follow-up story)
- How to Properly Monetize Your Blog (deep dive once you’re set up)
- Top Phrases That Get People to Buy (perfect for when you’re writing posts and sales pages)

