Do you happen to have the PERFECT gift to give to your loved one, but maybe you just need a super cute box to put it in? Don’t worry, I’m here for you!
This super cute DIY surprise gift box will be your new favorite way to wrap your tiny gifts. 🙂
Cute DIY Surprise Gift Box Cricut For Your Loved One (+ SVG)
Do you ever get tired of buying bags that are way too big for small simple gifts like gift cards? Or maybe you want to really give something to your loved ones that you made and has your whole heart wrapped up in it. <3 Trust me, I get it. I was too! These boxes are not only really cute but practical, and can be used all year round for special occasion gifts or even “just because” gifts.
This DIY gift box is super easy to make and the design means it has a built-in lid! I’ve got a step by step instruction list for you to follow, and once you get the hang of it, you’ll be making and using these boxes for gift ideas all the time!
These gift boxes are perfect for little gifts such as gift cards, candies, love notes, and tons more! And these aren’t just for a special someone (husband, boyfriend, wife, girlfriend etc), but also for your kids. You can fill these with little jewels/treasures, stickers, kid-friendly candy, and other little treats that they would love.
These boxes are a great way to remind someone how much you love them and are thinking of them. 🙂 Alright, let’s get right into it!
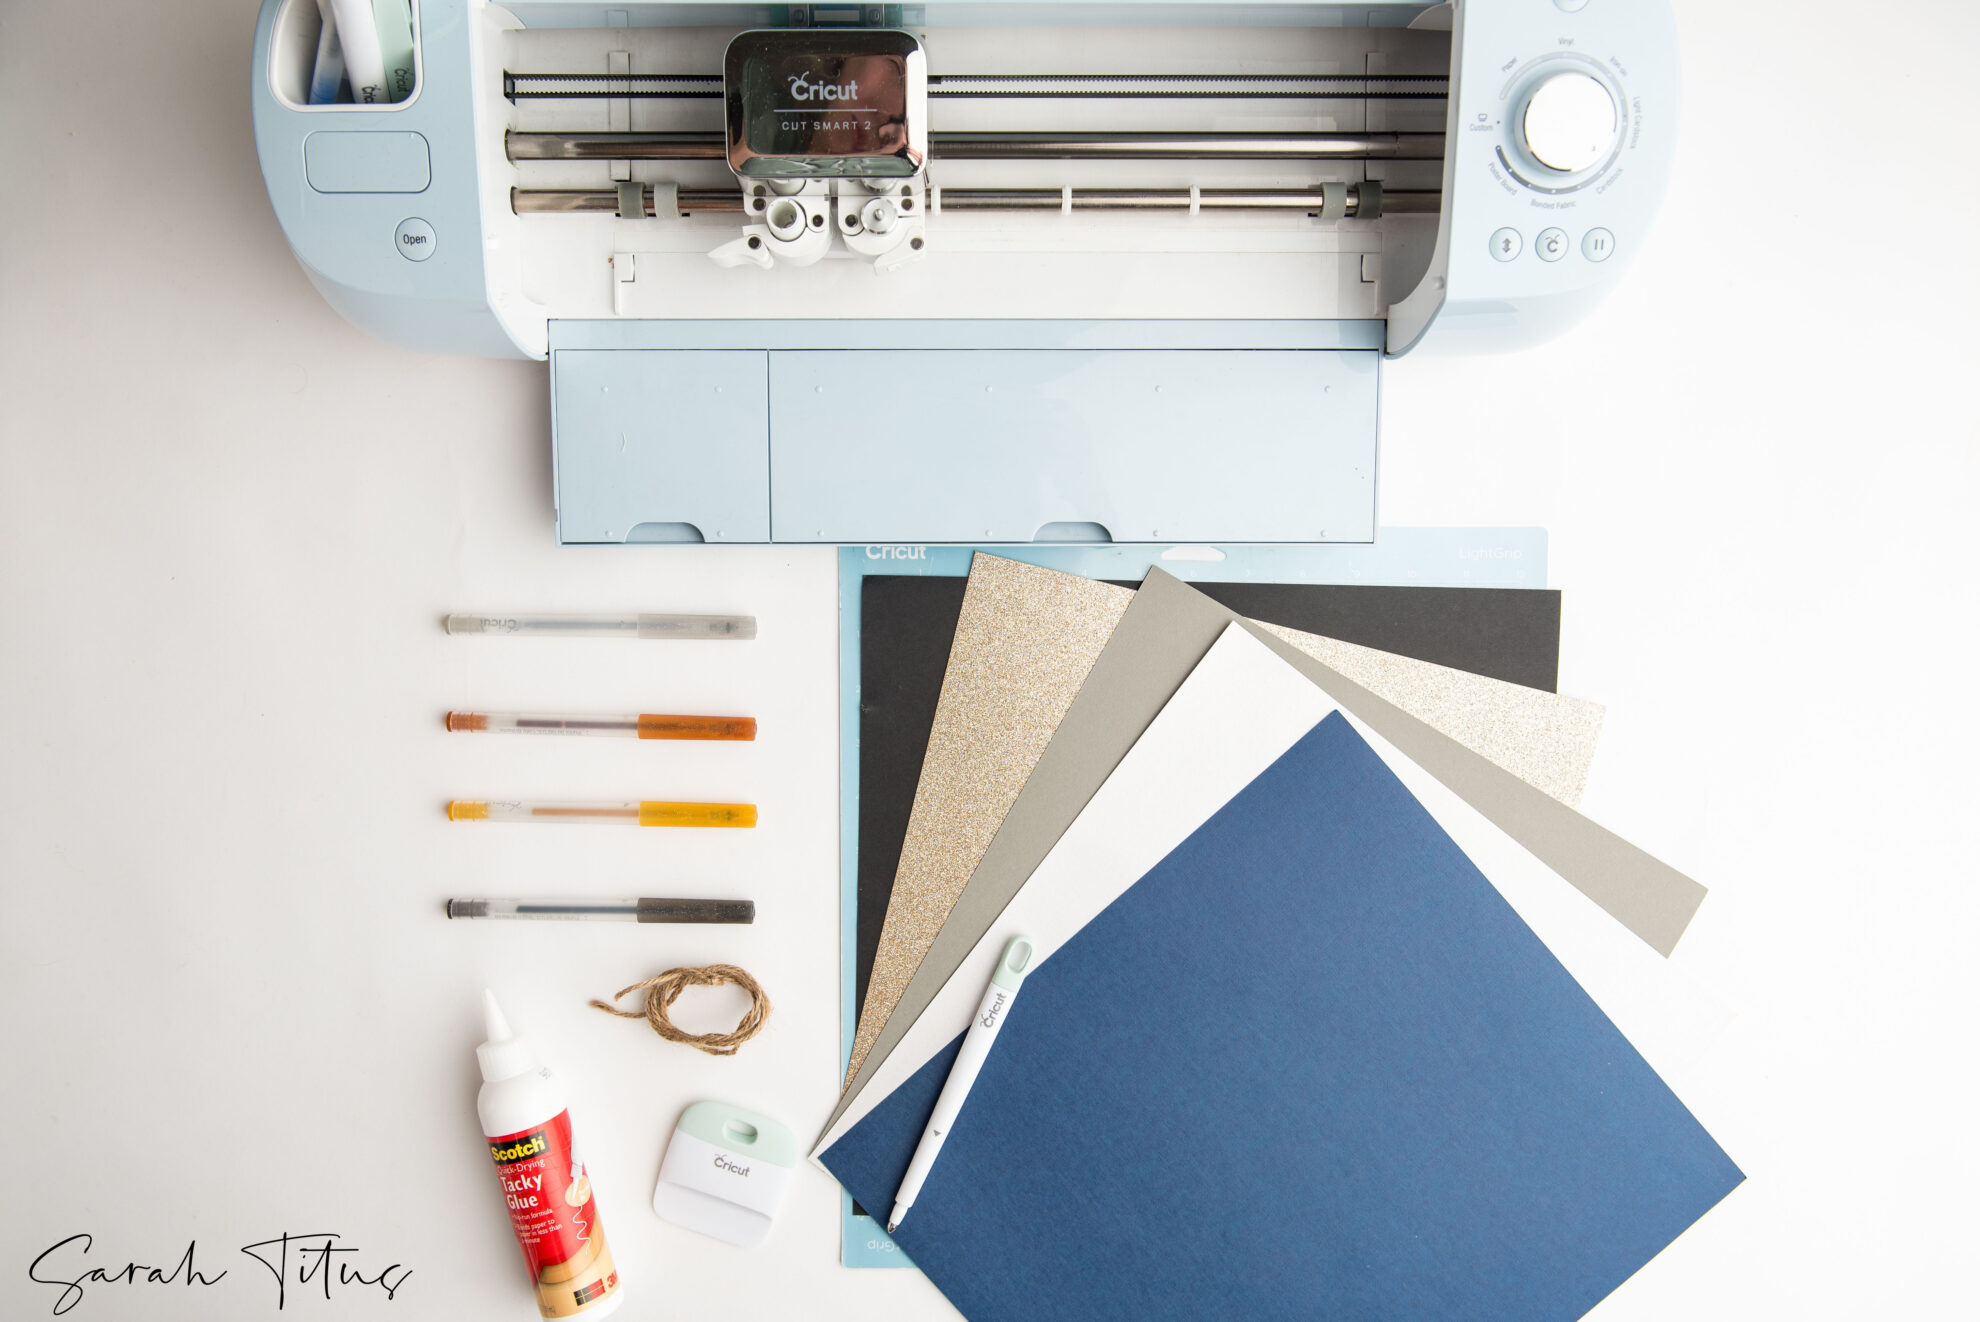
What you’ll need for this tutorial:
- Any cutting machine (Cricut, Silhouette, etc.)
- At least 2 sheets of card stock (12×12 works the best – one box per sheet)
- Blue light grip mat
- Scotch quick drying tacky glue (this works the absolute best for paper crafts as it has a precision tip)
- Cricut Scoring Stylus or scoring wheel
- Ribbon or twine
- Cricut glitter gels pens (I’m using the basic pack with gold and silver)
- Access to design space or design program
Pre-cutting – design space:
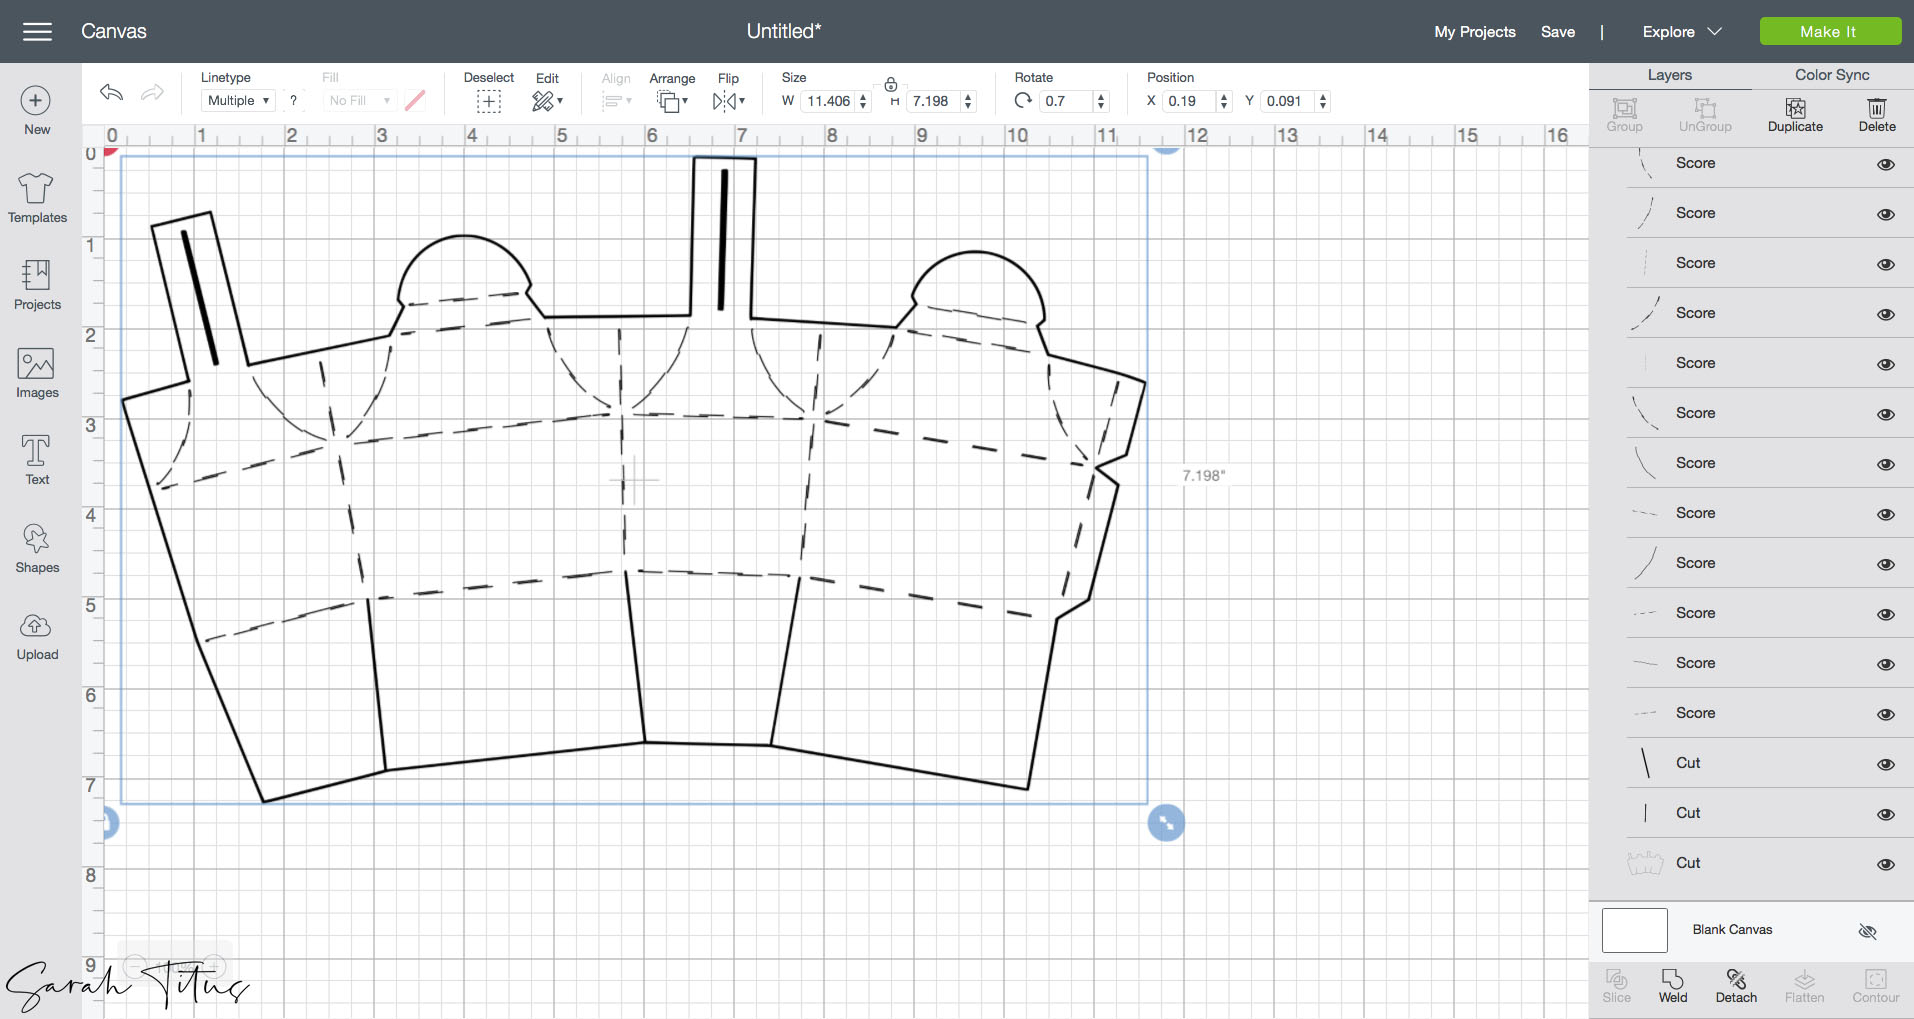
- In design space, upload the SVG (here’s the template).
- Adjust the sizing of your file to a width of 11.406” and height will auto populate to approximately 7.198”.
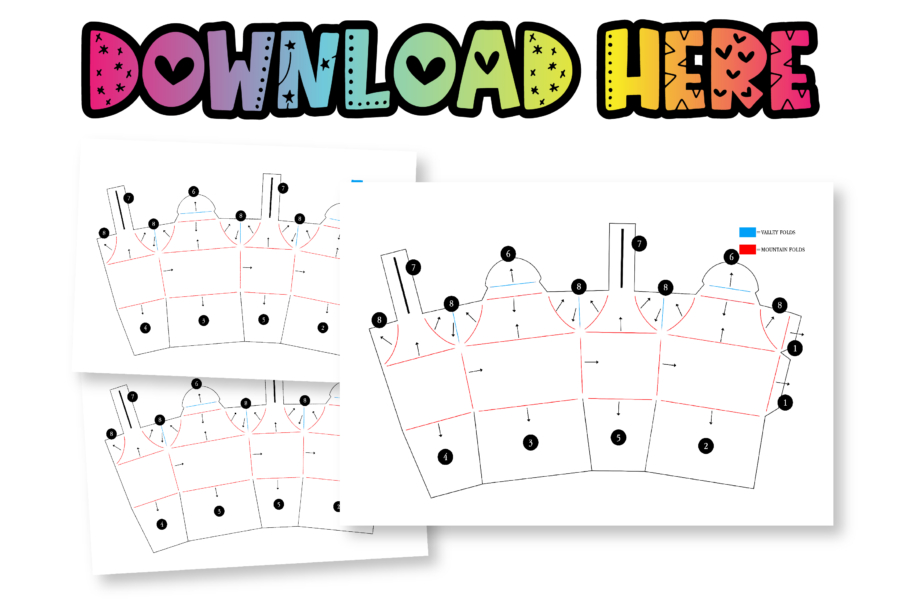
For this next part be sure to see the design space screenshot as well as the instructional guide (below) to be sure to change all lines needed for scoring. These will eventually serve as your fold lines.
- In design space, be sure to highlight all the fold lines. On the toolbar click the down drop menu titled “line type” and change the fold lines to “score”.
- BE SURE TO HIGHLIGHT ALL LAYERS ONCE SCORED AND HIT “ATTACH TO” BEFORE CUTTING. THIS IS IMPORTANT (otherwise, design space will want to cut all lines separately rather than all together).
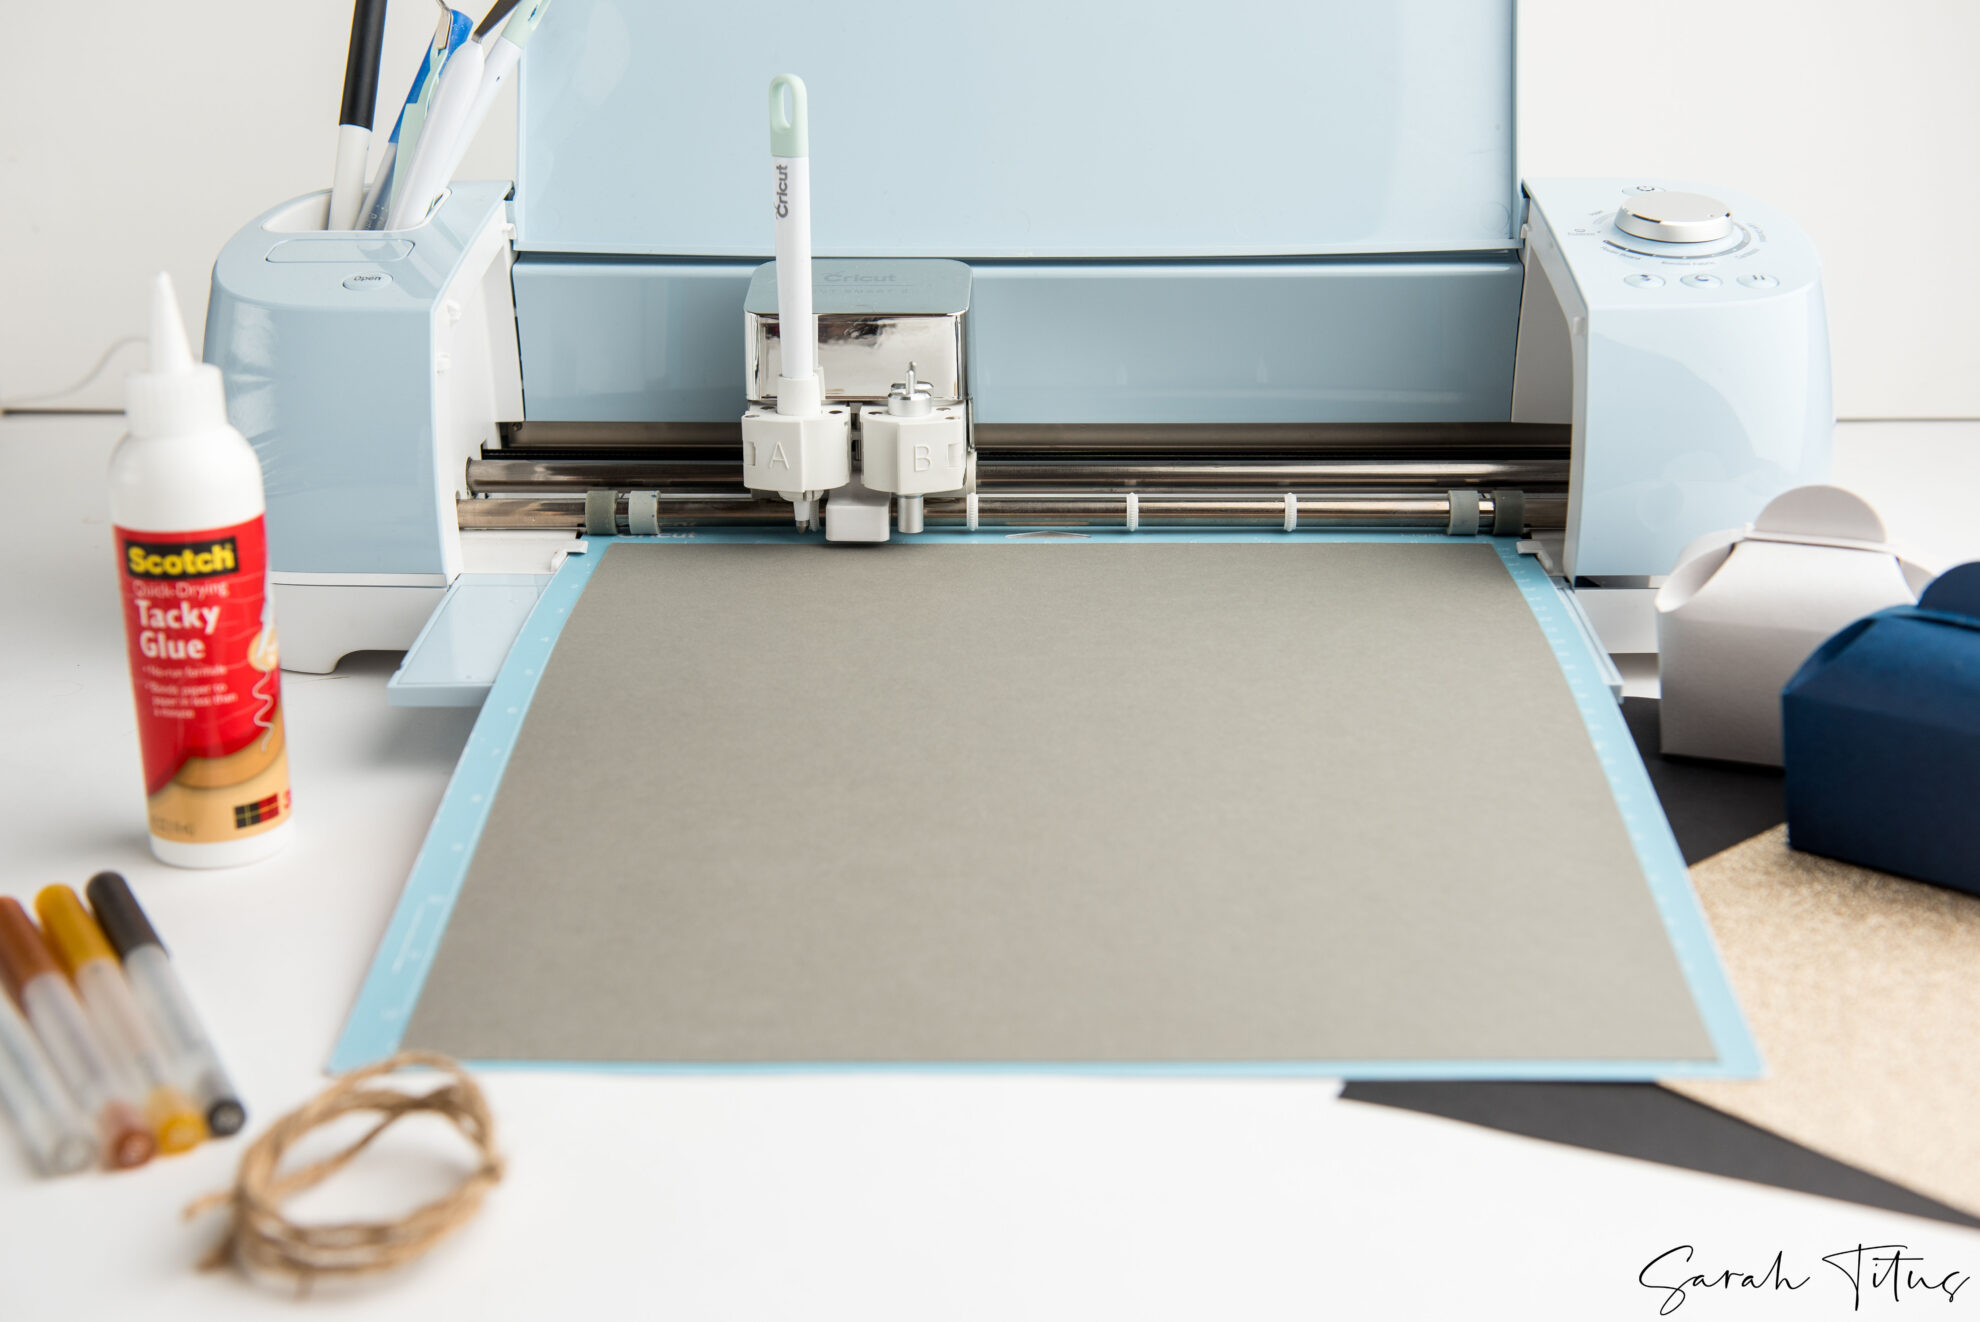
- Load your paper on the light blue grip mat and your scoring stylus into the machine’s clamp A.
- Adjust your material dial to card stock. If using a heavier weighted card stock make sure to adjust pressure.
Tag – Cut and draw (optional)
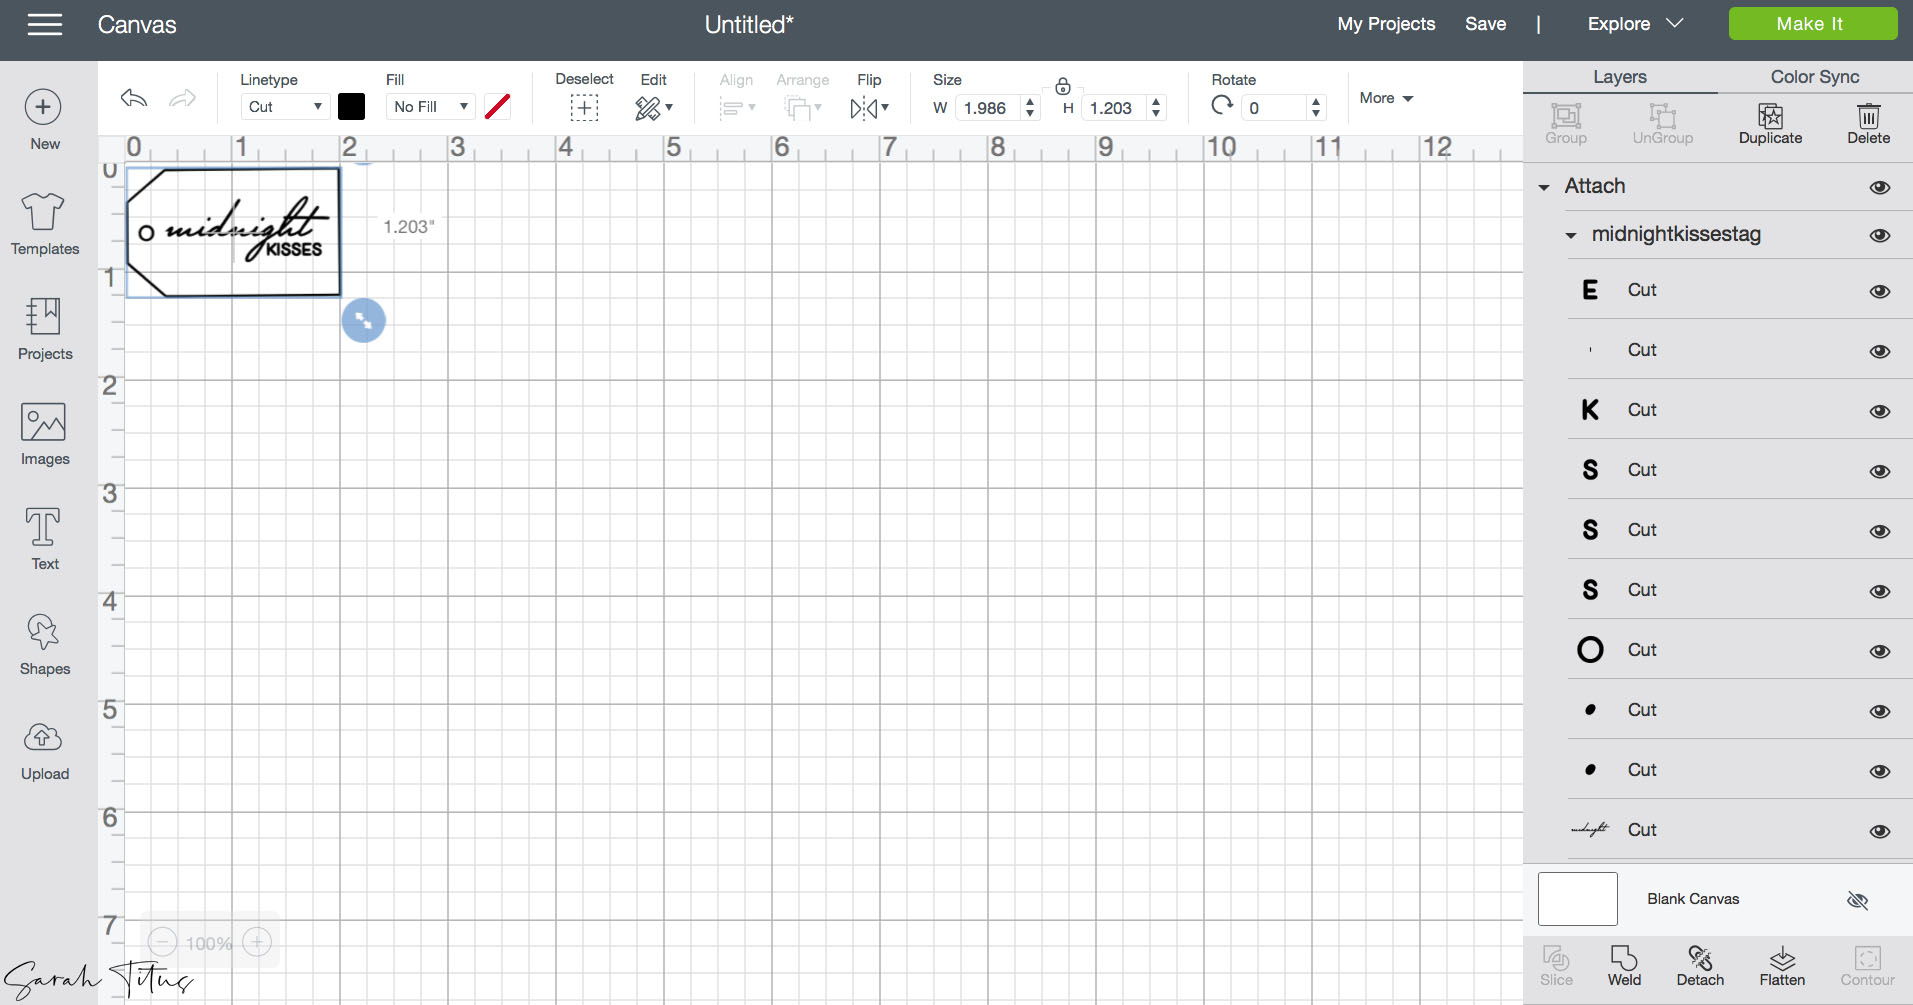
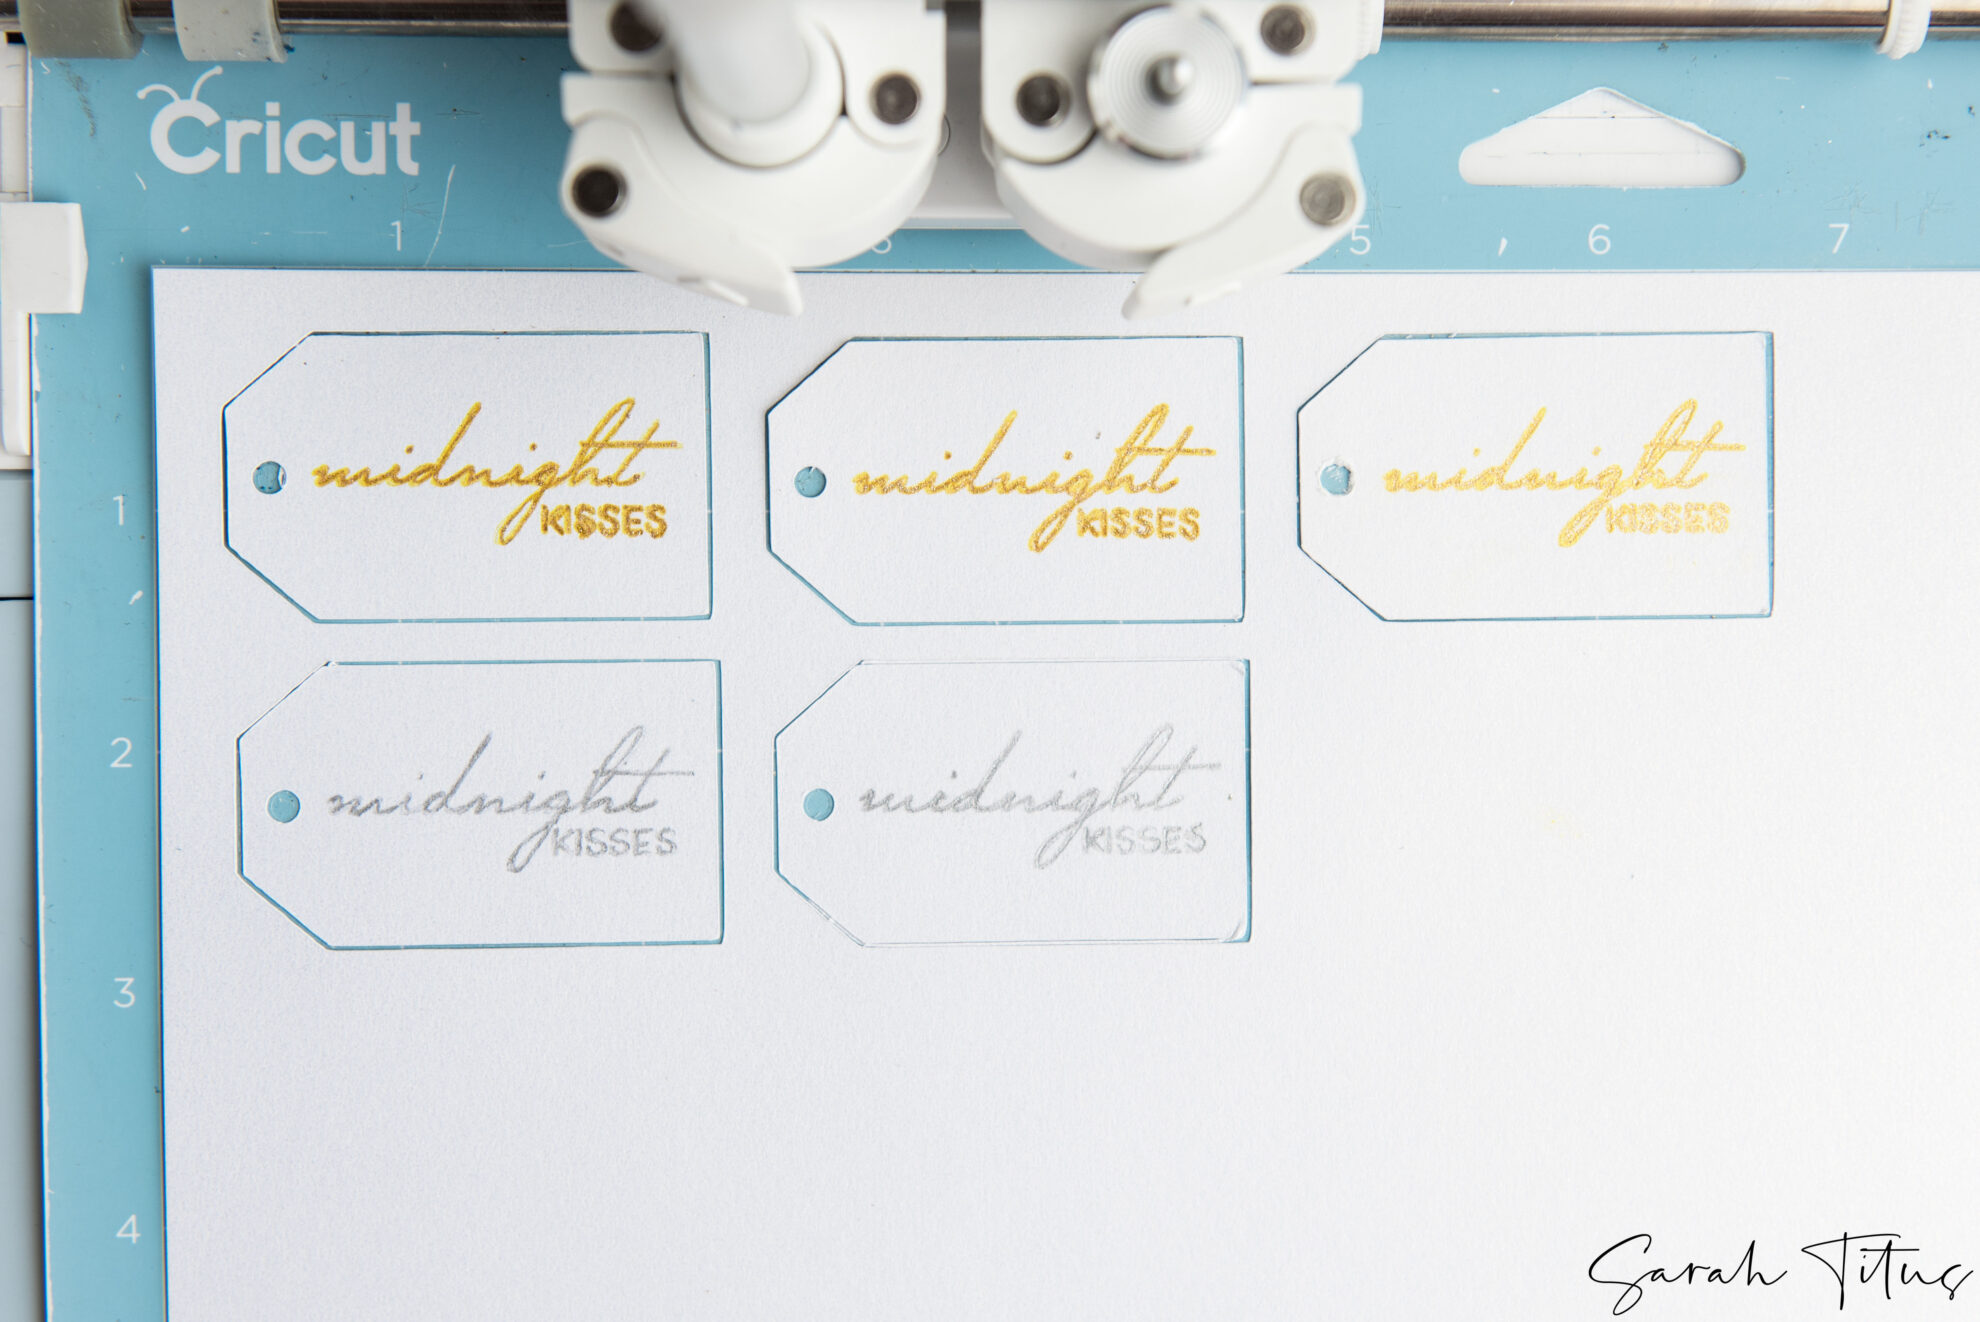
- If adding a tag (here’s the template), repeat the same steps above. Once your blank tag SVG is uploaded you’ll adjust the size of the tag to approximately 1.9” wide and 1.203” tall.
- Add any writing font that you would like for your tag and move to the middle. Be sure that it is a skinny writing font (If you would like to know what fonts I am using, they are Mr. Sheffield for the word “midnight” and Helvetica regular for the word “KISSES”). You can get Mr. Sheffield (for commercial use here and free for personal use here)
- Highlight the font layer and on the top toolbar change the down drop menu titled “line type” from cut to “draw”.
- BE SURE TO HIGHLIGHT ALL LAYERS ONCE SCORED AND HIT ATTACH TO BEFORE CUTTING. THIS IS IMPORTANT (otherwise, design space will want to cut all of the lines separately rather than all together).
- Duplicate this for as many tags as needed.
- Load your paper on the light blue grip mat and load your pen into the machine’s clamp A.
- Adjust your material dial to card stock. If using a heavier weight card stock be sure to adjust pressure.
Assembly
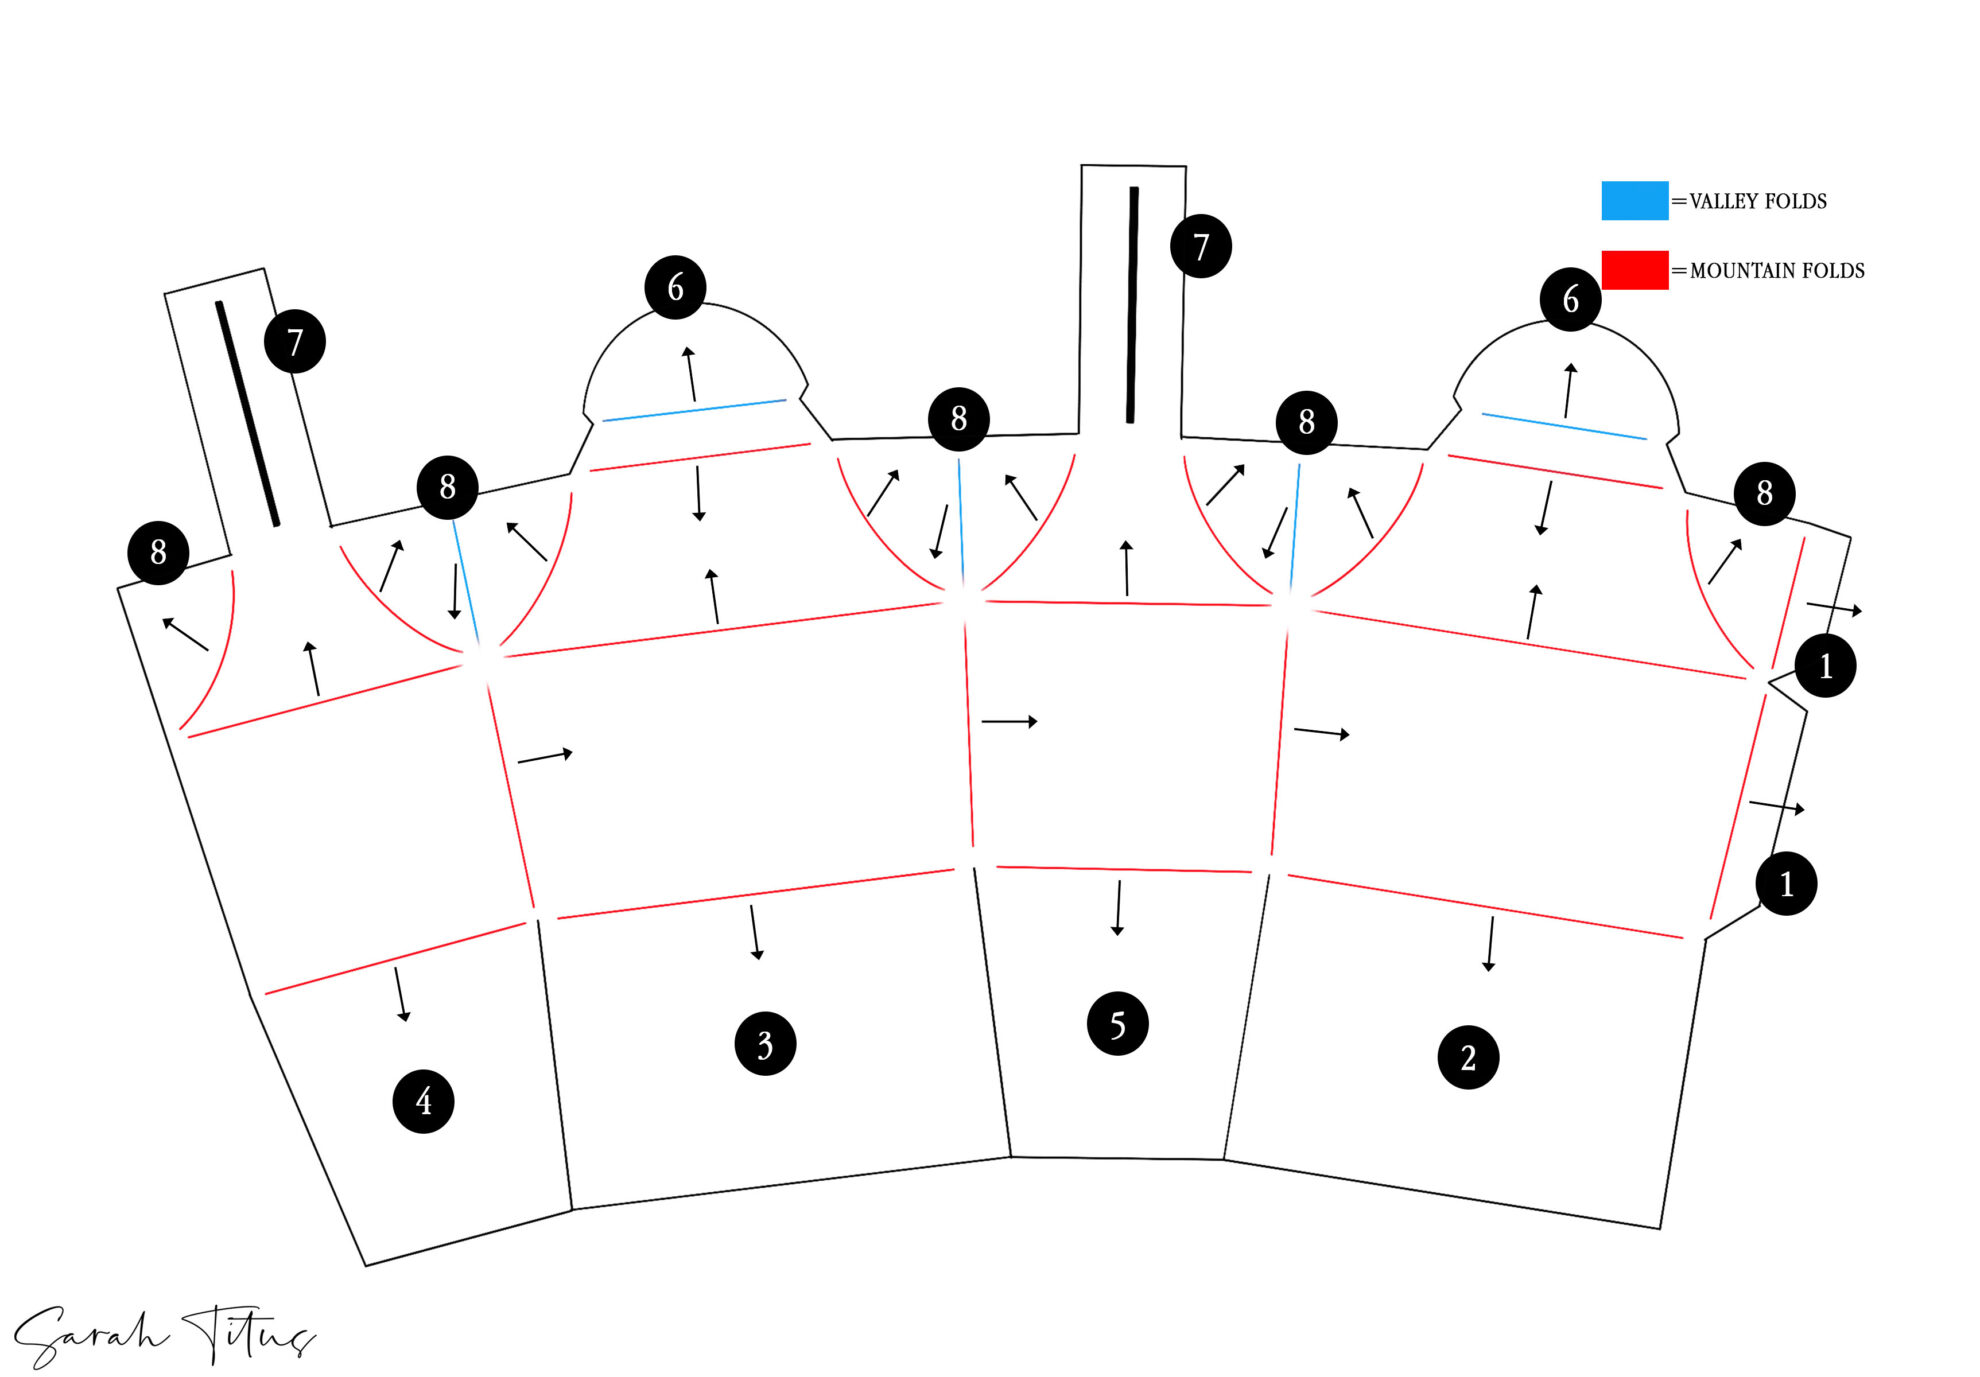
Follow the instructional guide on how to fold the lines. It is very important to follow each number as labeled first.
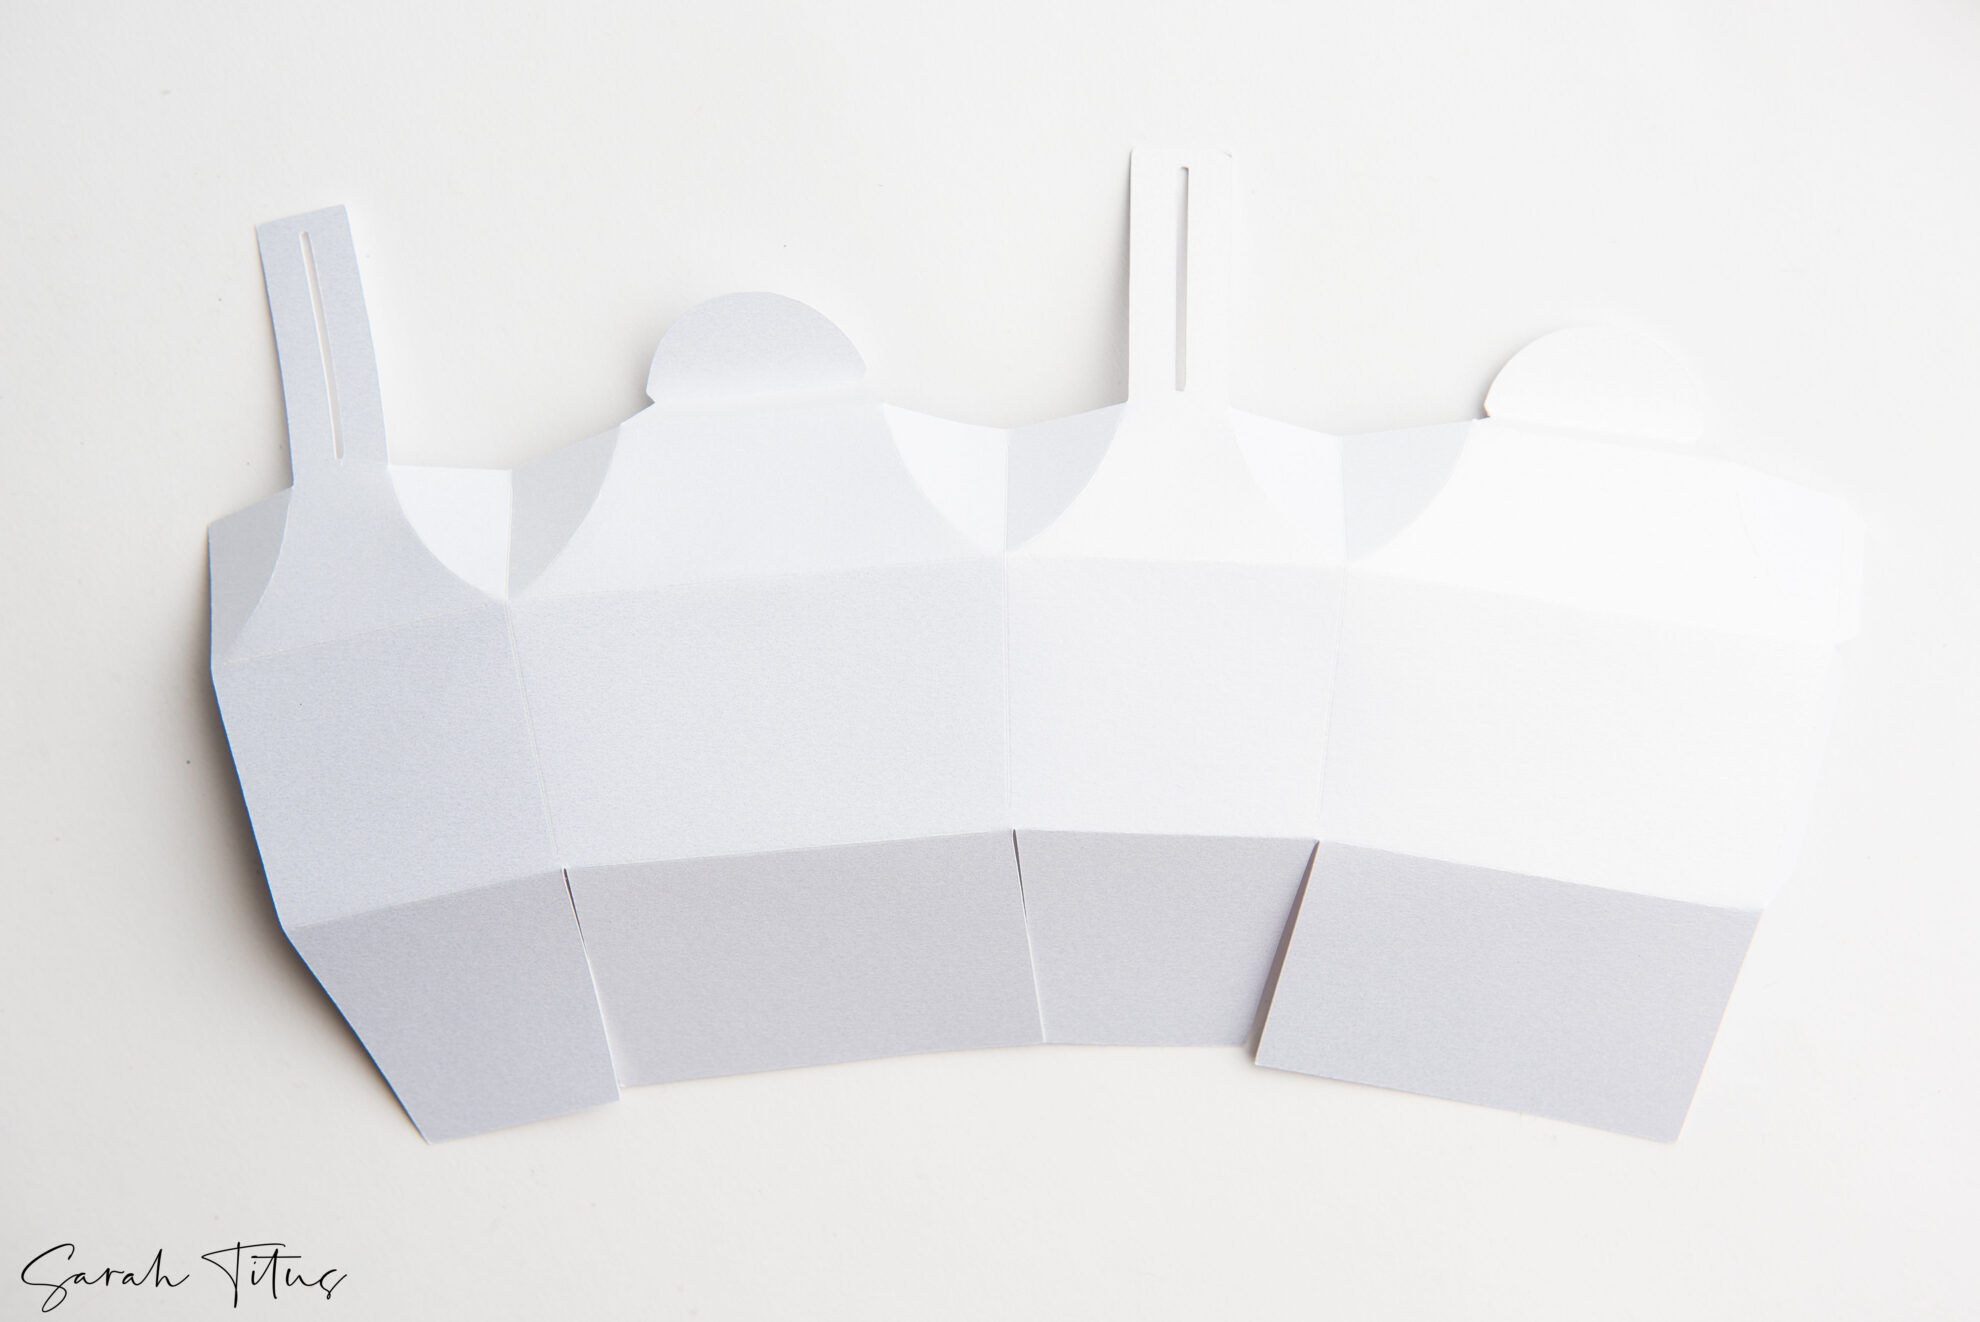
• Once your project has cut, begin to fold all your lines (see guide). The sides of the box (step #8 on the guide) when folding will have 2 mountain folds and 1 valley fold in the center creating a fortune cookie effect.
• Once folded, begin by gluing step #1 to the opposite side to form a box shape. Be sure that the score marks line up together to avoid the box from being crooked.
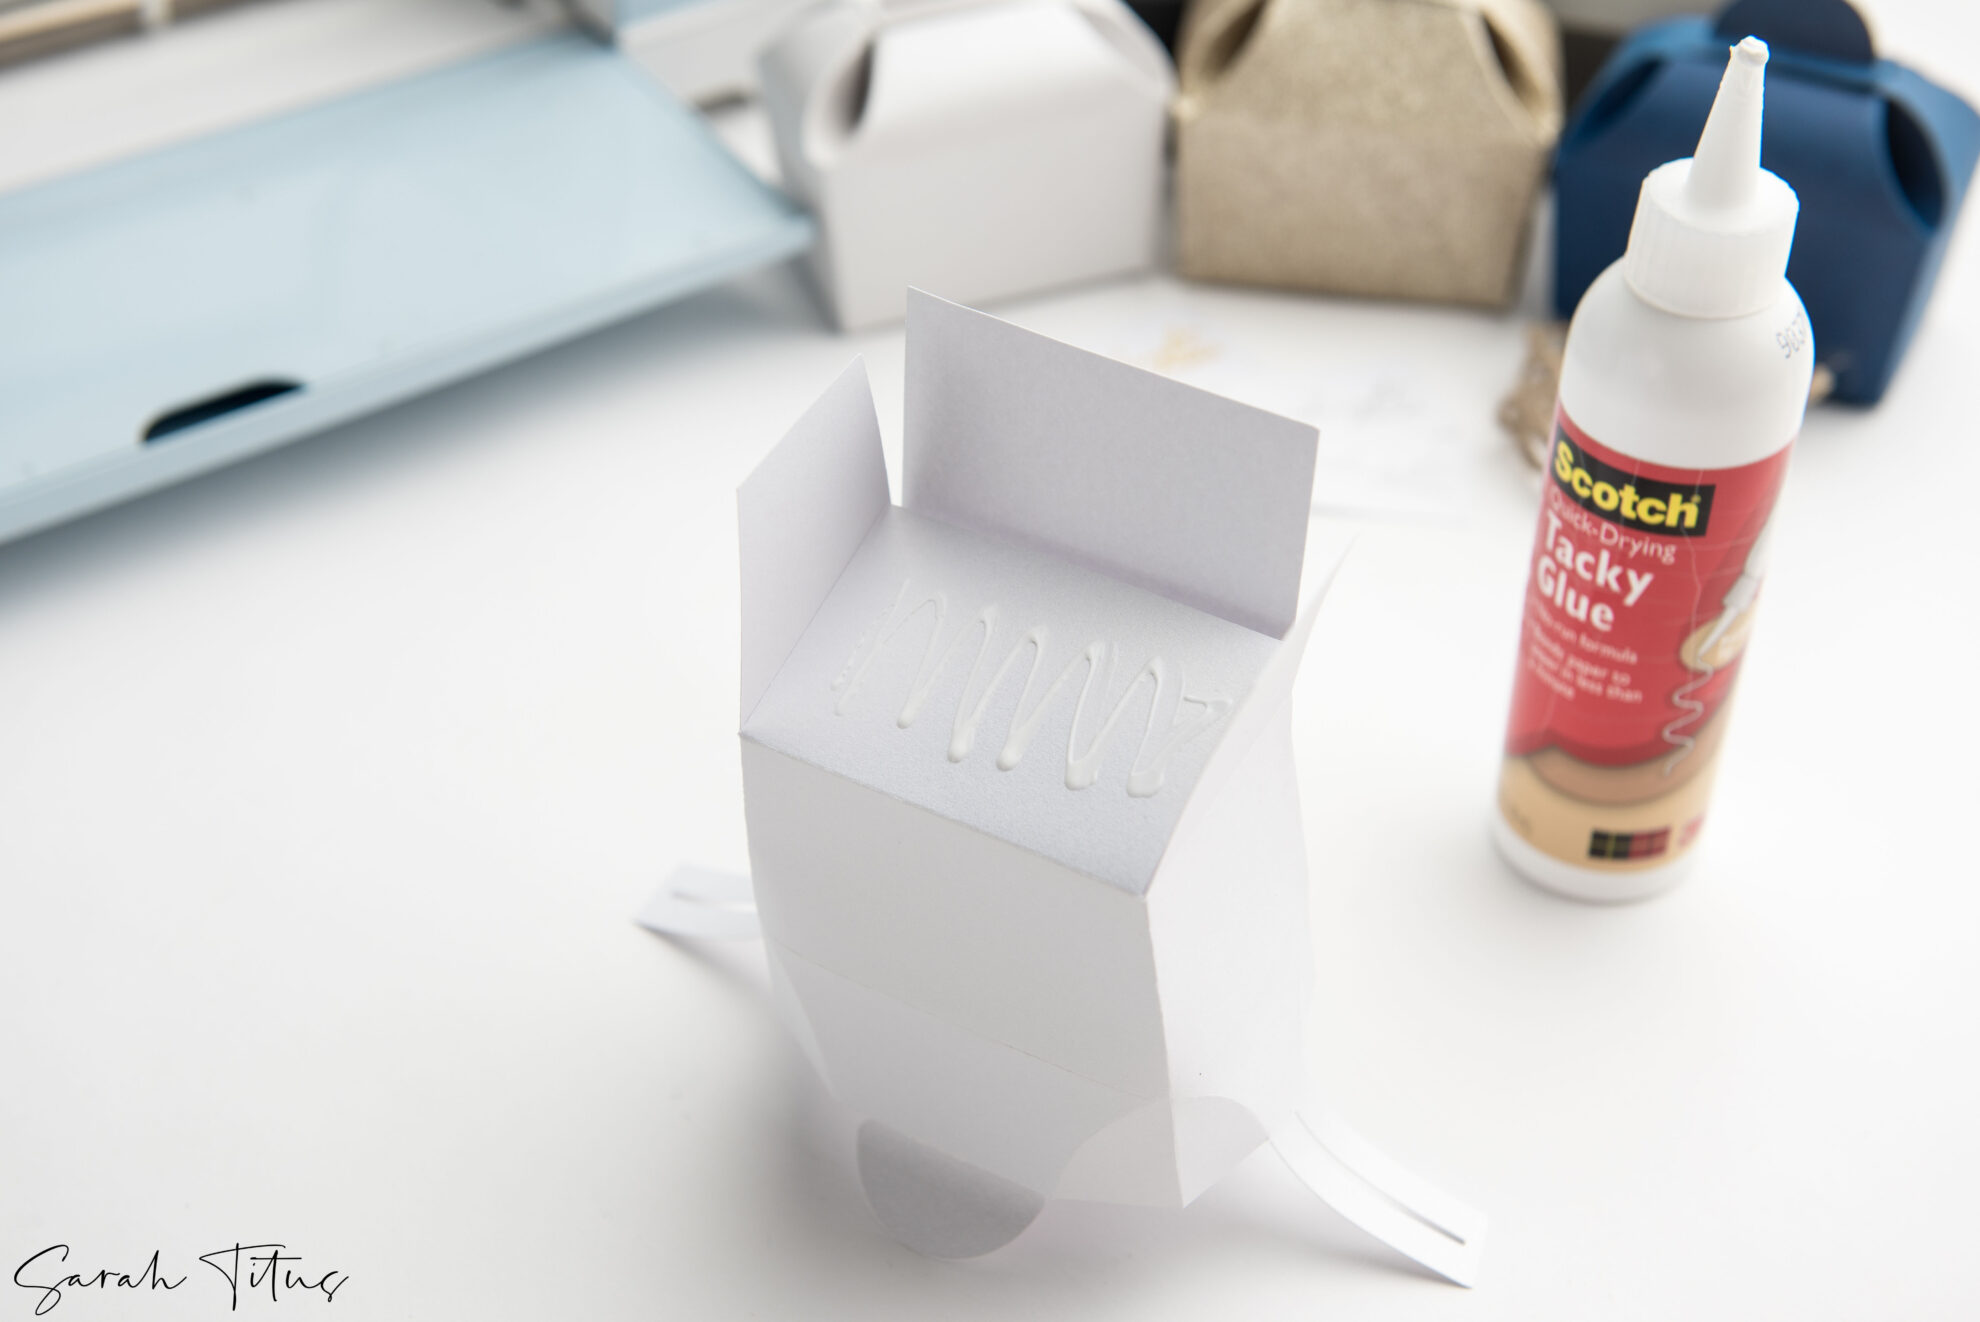
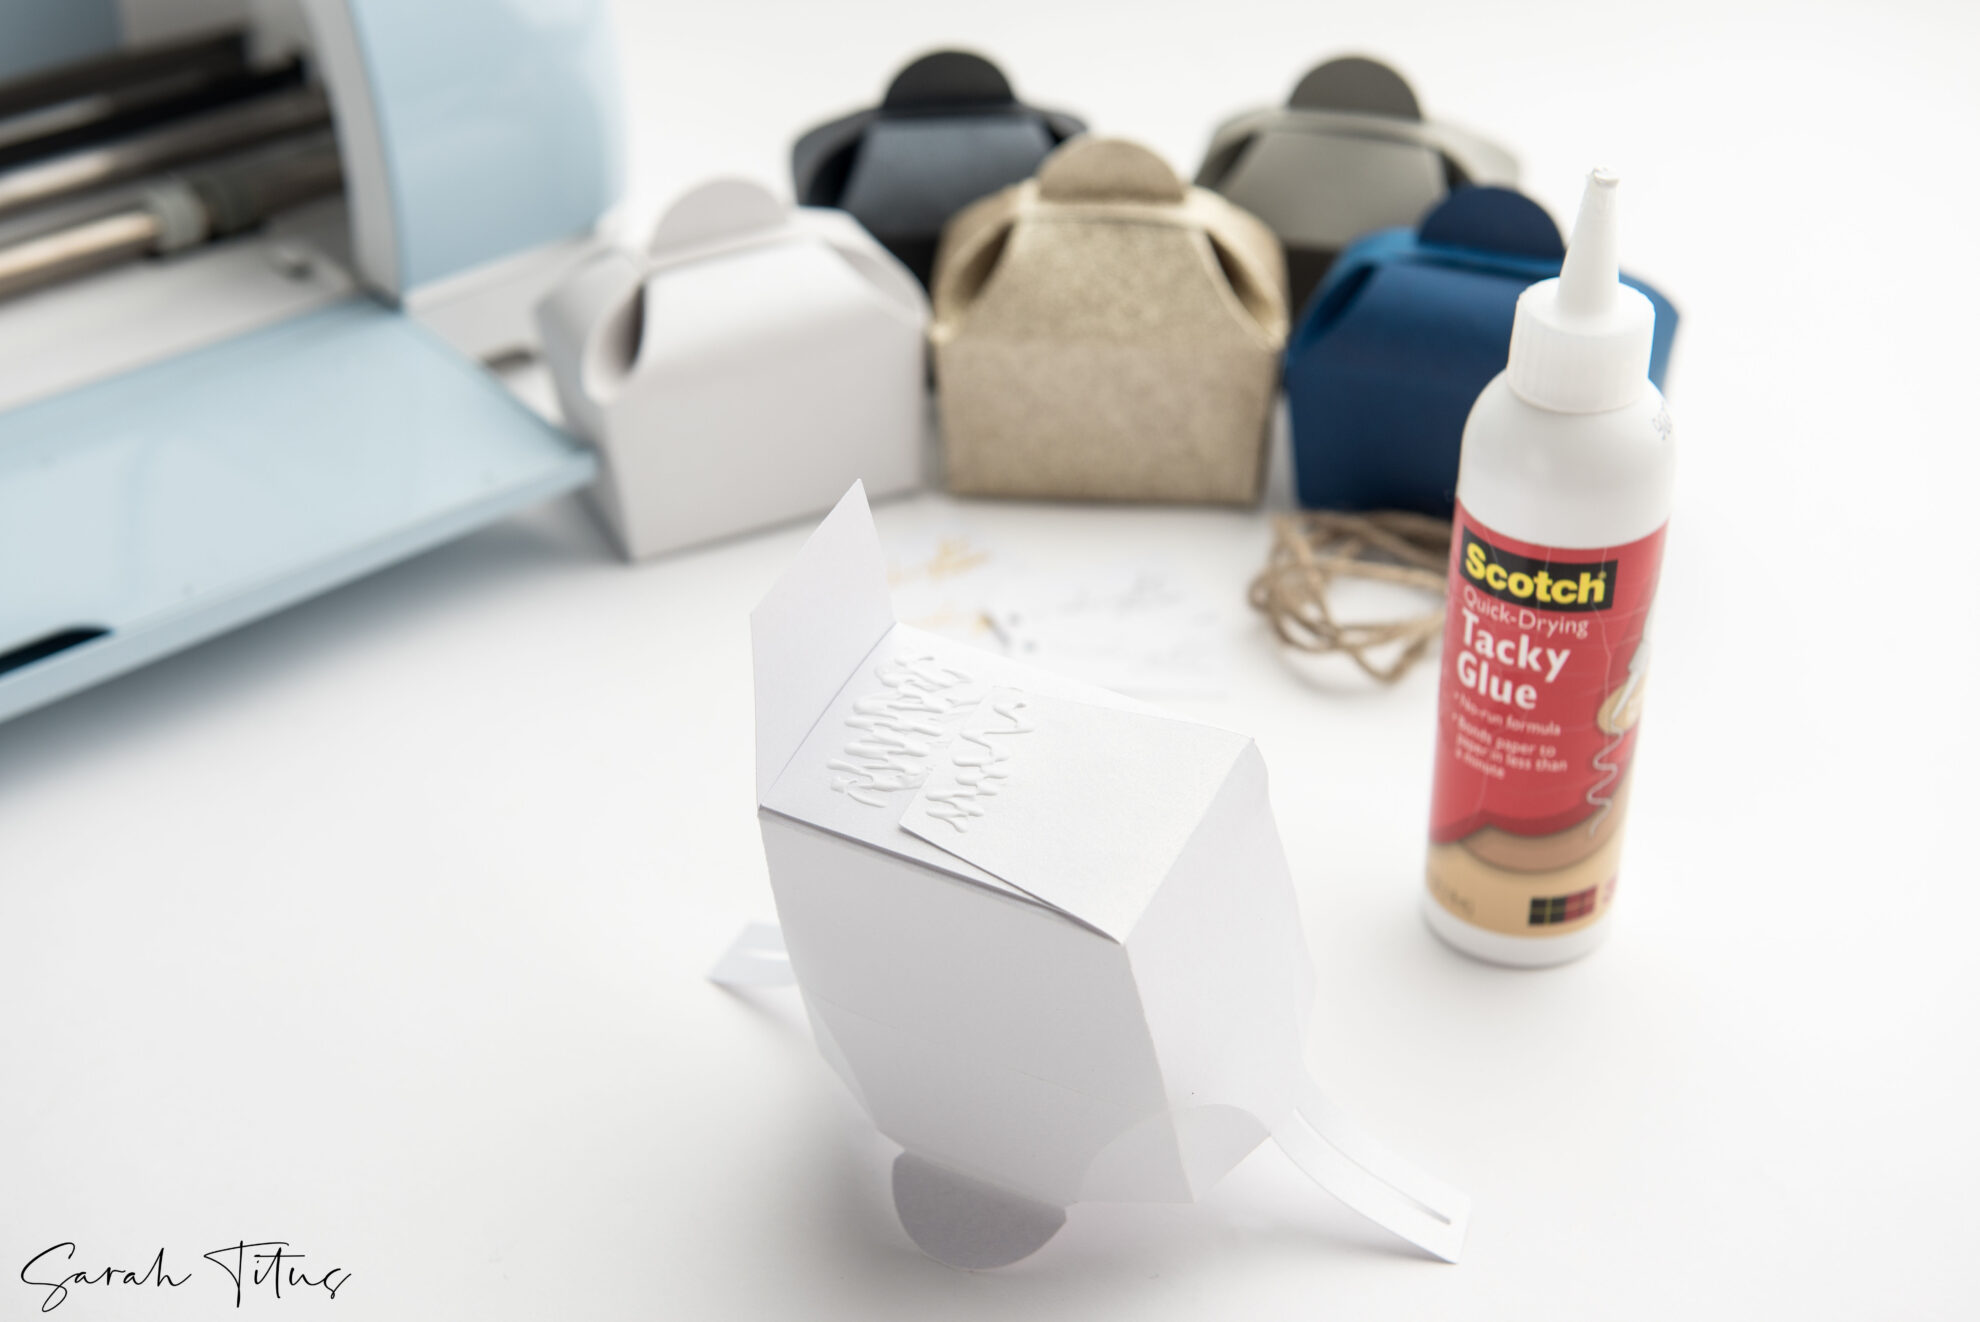
• Next, fold bottom flap #2 inwards and add glue to the top. Fold bottom flap #3 on top. This will begin to create the bottom of the box.
• After, add glue on top of bottom flap #3 and fold in bottom flap #4. Add more glue on top of bottom flap #4 and #3 while folding down bottom flap #5. At this point, the bottom of the box should be created and able to hold objects.
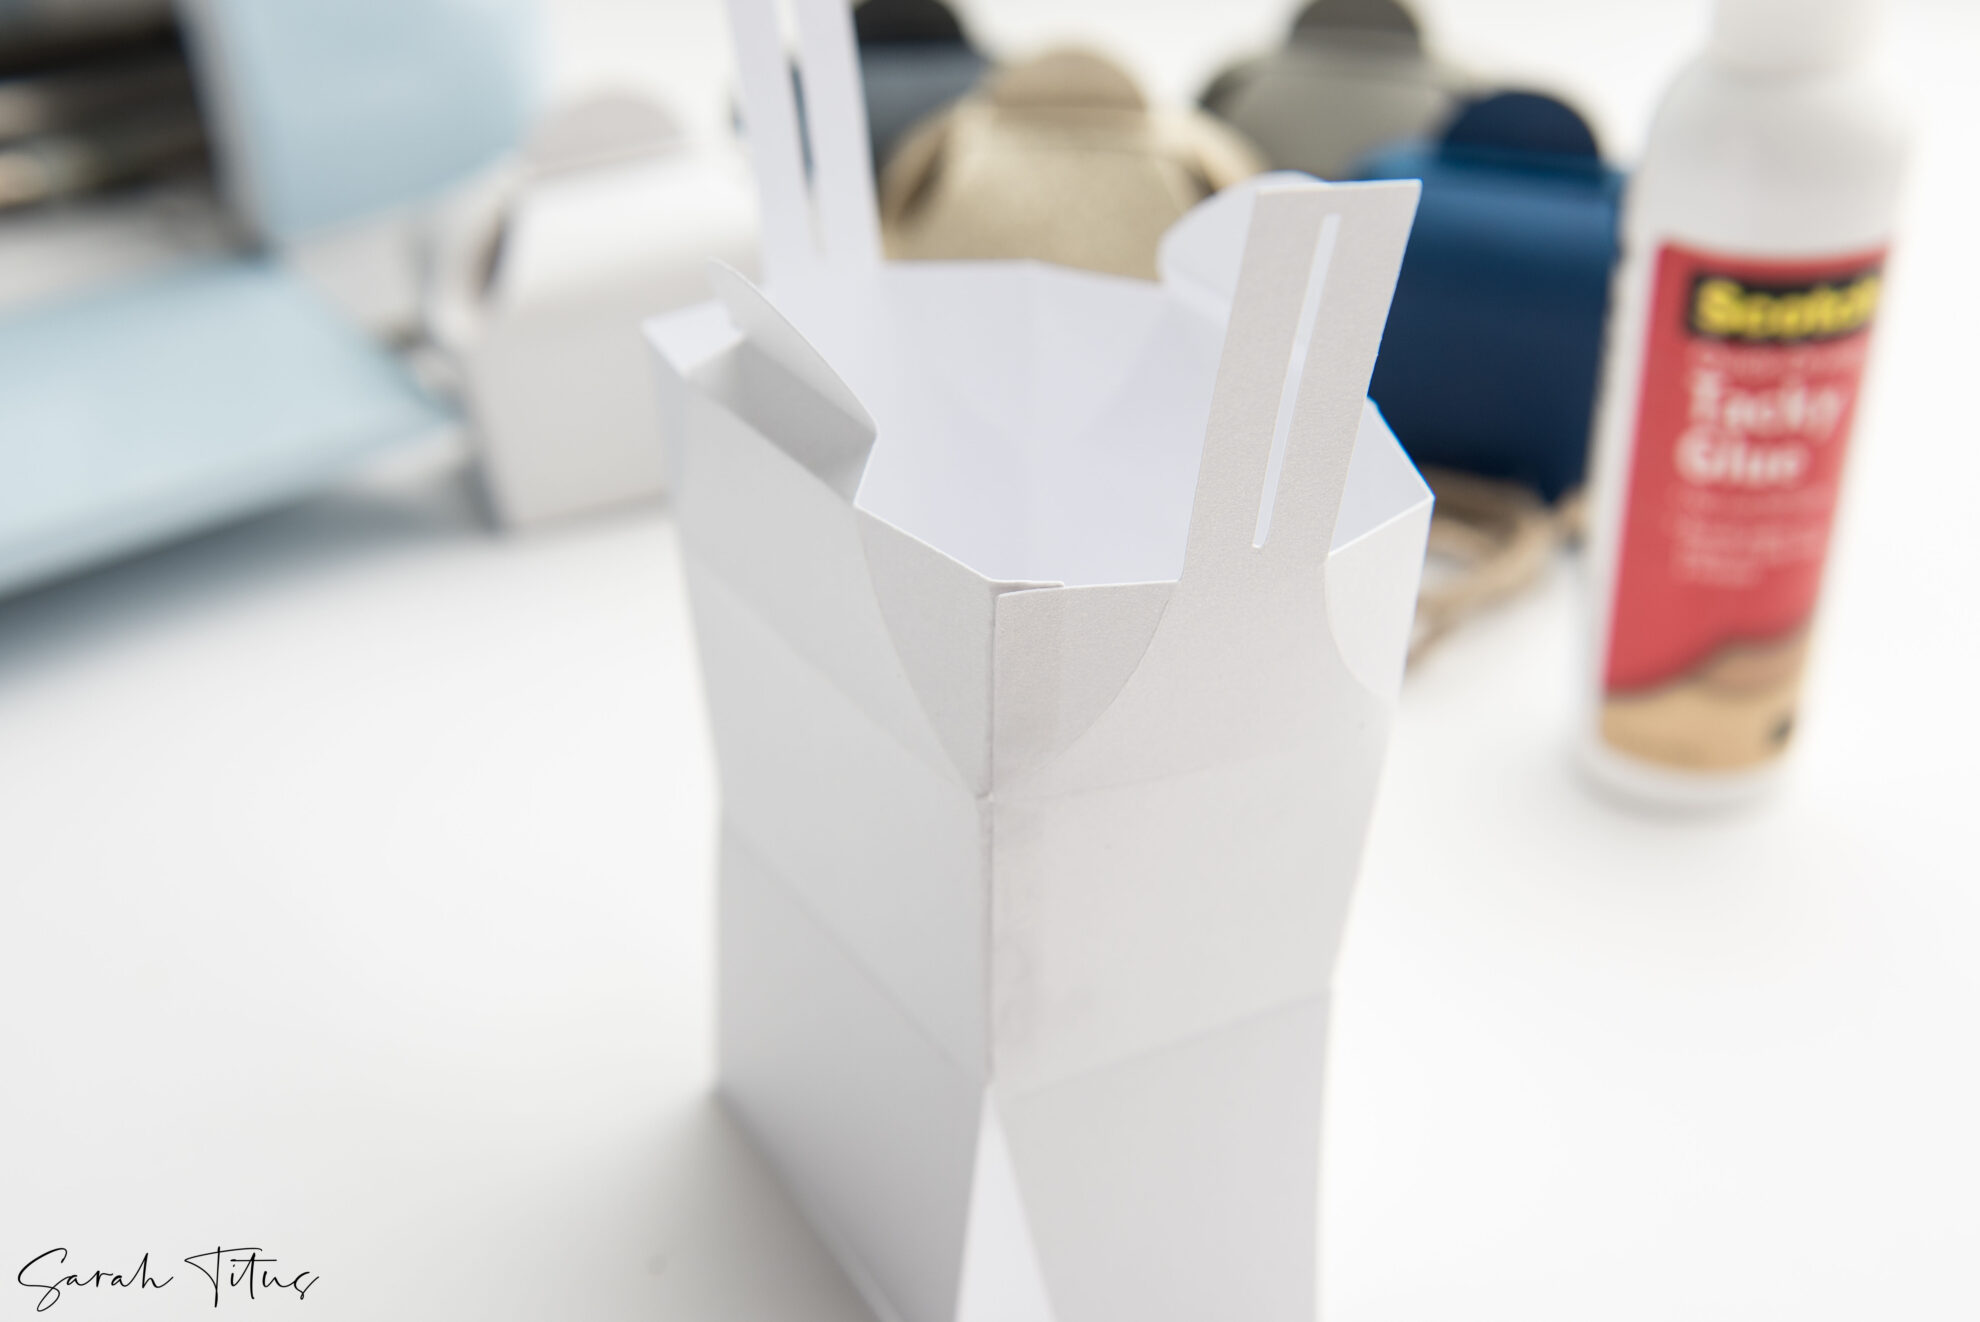
• Let the glue dry and fill your box with some candy or gift.
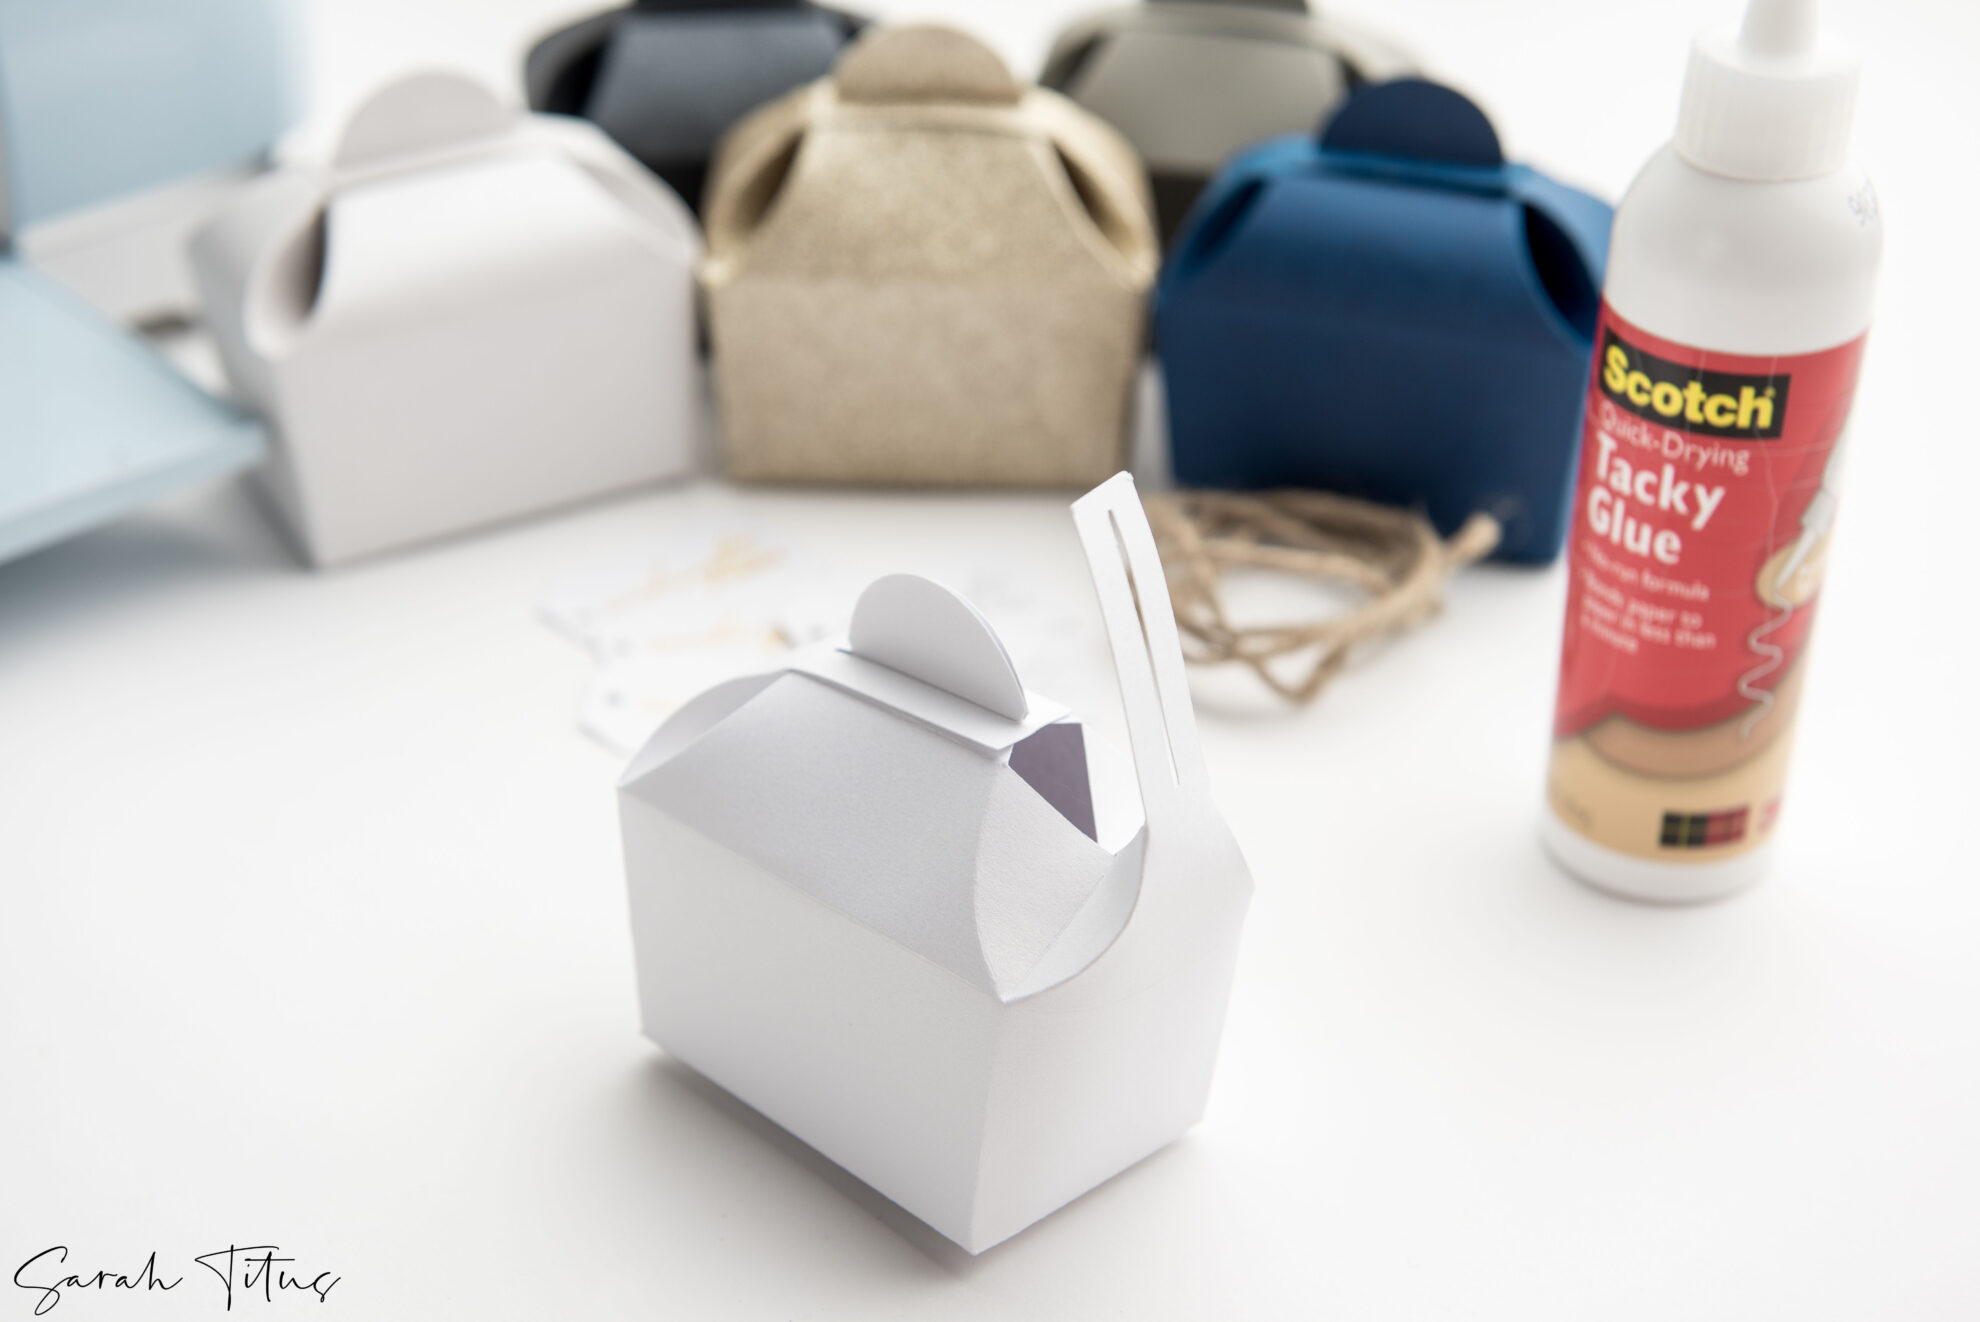
• To close, place both pointer fingers and thumbs on all flap #8 and help the box to collapse inwards.
• Grab both flap #6 and hold them together in one hand as you grab one of the #7 flaps and bring the slit down and over top of both #6 flaps. This will hold them together in place.
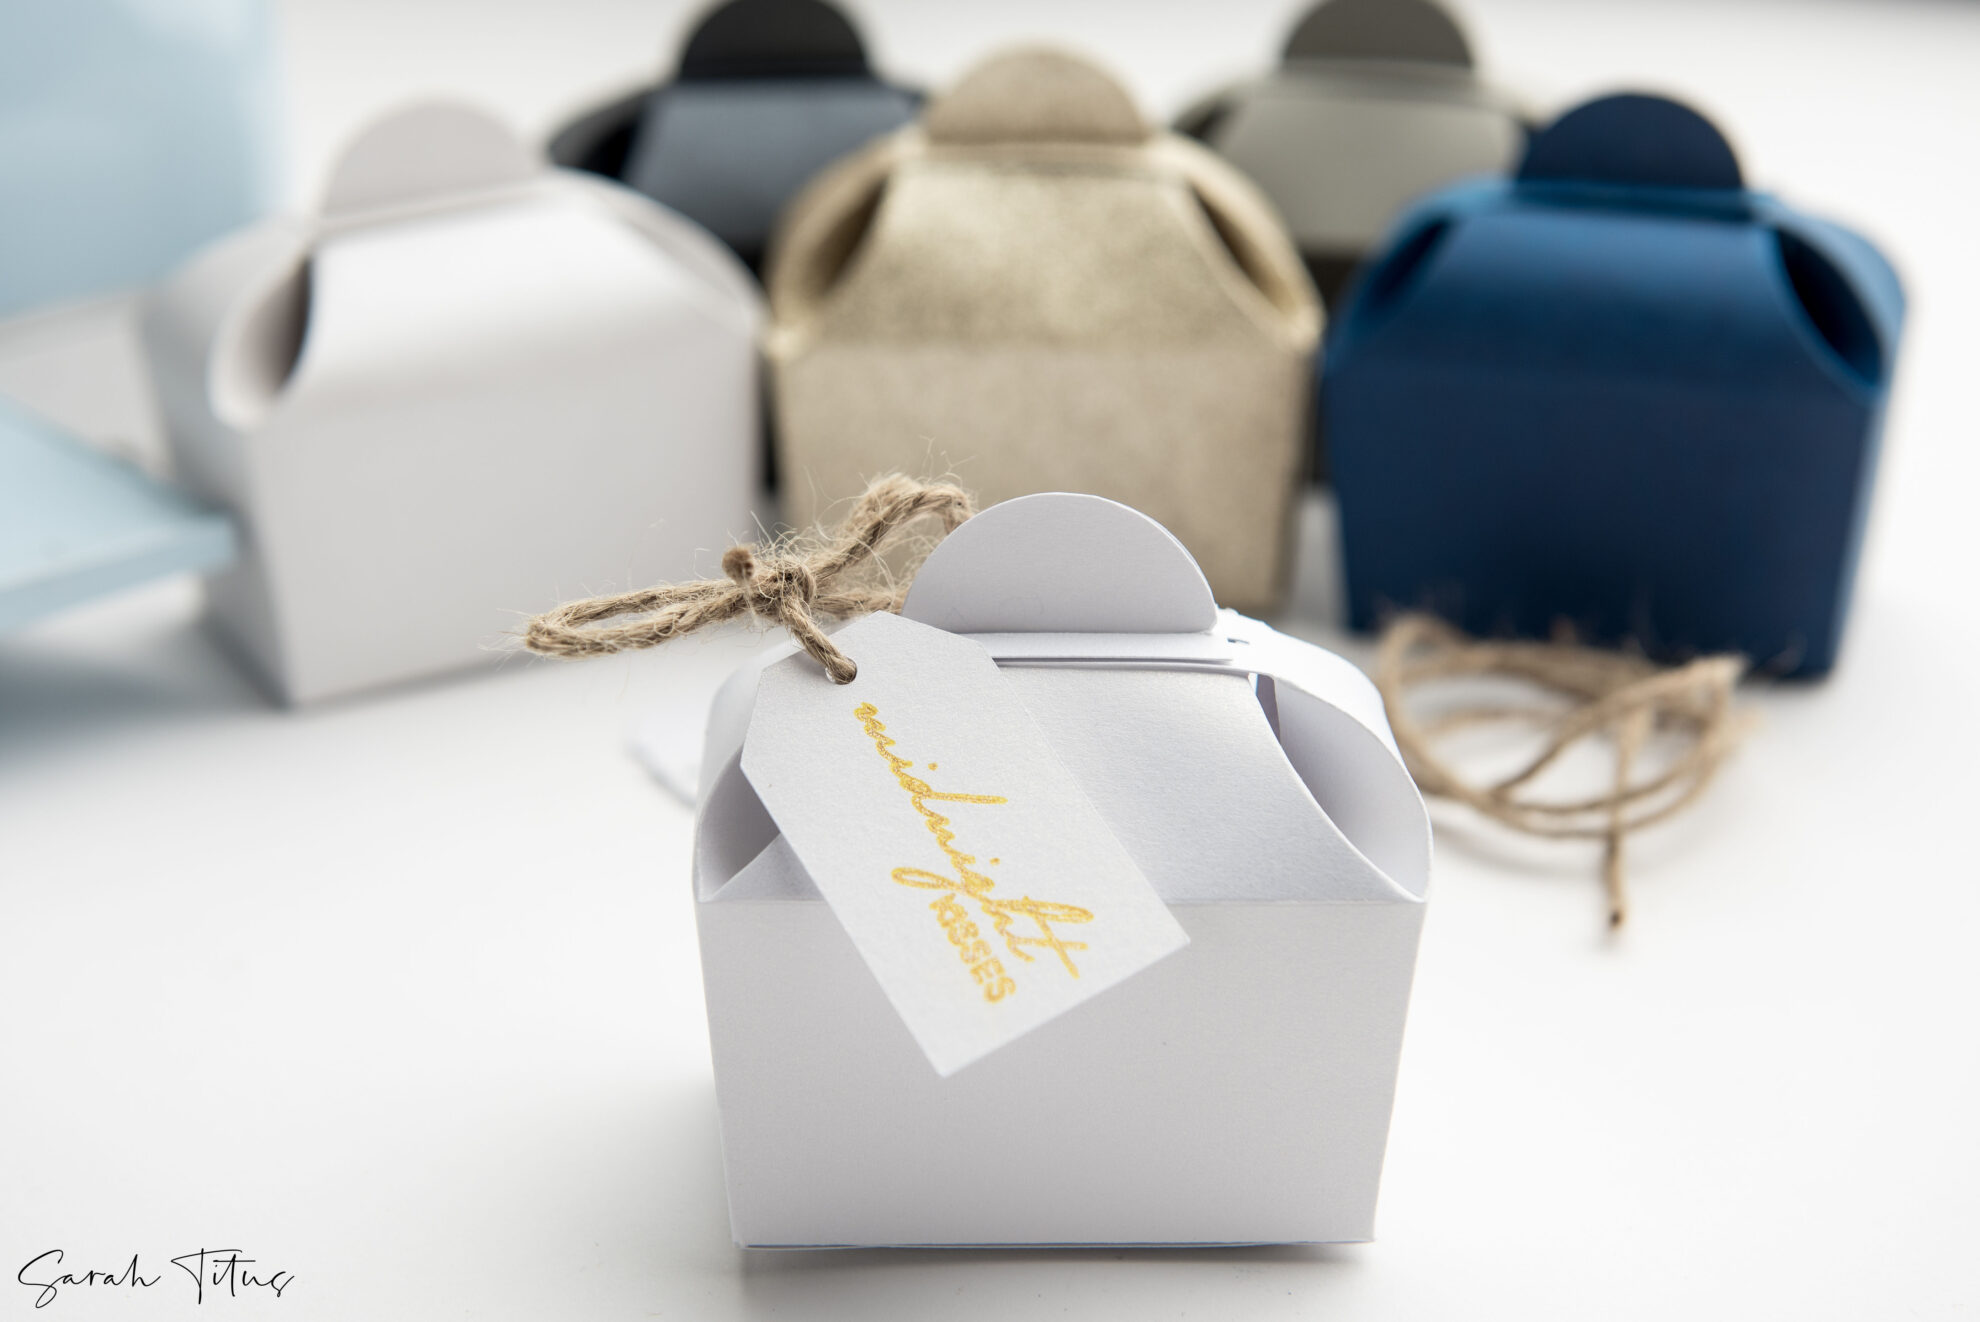
• Before completely closing your box, add a ribbon to your tag and hang it from the last #7 flap (OPTIONAL). Repeat and bring the last #7 flap down and on top of the previous flap #7 and both #6 flaps. This closes your box and keeps all contents inside like a lid.
Download the cute DIY surprise gift box PDF guide here.
Here’s the SVG files:
Need help uploading your SVG into Cricut? Click here to see our full tutorial!
