With all of the devices we can capture our favorite moments on, from phones to professional cameras and even tablets these days, it’s no wonder many of us have photo overload and more pictures than we know what to do with.
I mean what parent isn’t out there taking hundreds of digital photograph shots of just our kids. We don’t want to lose those memories, right, but what’s the best way to organize photos?
Being a blogger, I would say that I have a lot more photo’s than the average person. I have all my kids photos, my vacation photos, my friends photos, even pet photos. Add to that all the photo’s that I take for the blog. Pictures of my kids, pictures of my home, pictures of random things here and there.
It’s a LOT OF PICTURES people! LOL.
But, they are all organized nice and neat (remember I’m totally an organizational freak). When I say EVERYTHING has to be organized, I really mean it. 🙂
If I can organize all MY photo’s, surely you can organize yours. It’s not really hard once you figure out a system. Today, I’ll be sharing my straightforward system with you and some great tips for organizing photos, so that you can find them easily ASAP when you need them.
How Organized People Properly Organize Their Photos
The first thing you want to do is to make sure you save them to your computer from your photography device. You don’t want to just store them on your phone or digital camera. (Here’s my favorite camera that I use — I have the T4i older version. I bought this when I started making a full-time income on eBay and it’s been wonderful for me. If you don’t have that kind of money, you’ll get similar shots by using the best stick camera you can. Of all the ones I’ve tried over the years, this one here is my favorite and the one my daughter now uses — we have the W330 older version).
The reason that you don’t want to keep the pictures JUST on your digital device is because they can be easily stolen, lost, or damaged. If you use them as a storage device, you are really risking losing the photo’s forever. Instead, at least once every couple of weeks (if you take frequent pictures) download them to your computer.
Don’t save each image to your computer. This can very hard to do, especially when it comes to photo’s that mean a lot to you, but get rid of any that are not completely in focus, are very similar (keep the best) or are of nothing all that important. Your overall organization will go smoother if you have less to work with to begin with.
After you upload them to your computer, move the pictures to a new folder you will create.
Some people like to make folders according to the event, such as Fourth of July Picnic or the name of your child. Others like to save them by date. I do both.
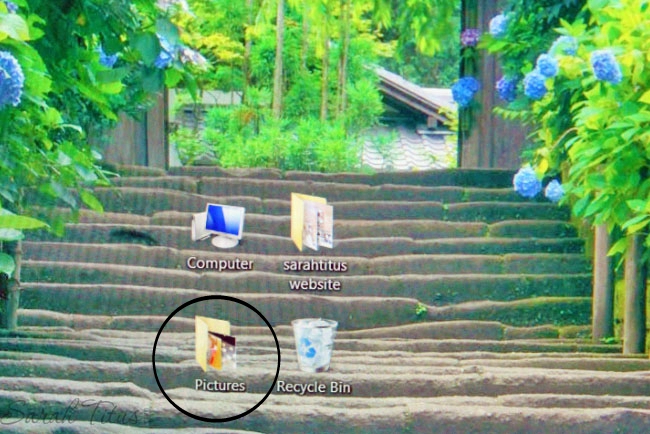
On my desktop, I have a folder called “Pictures.”
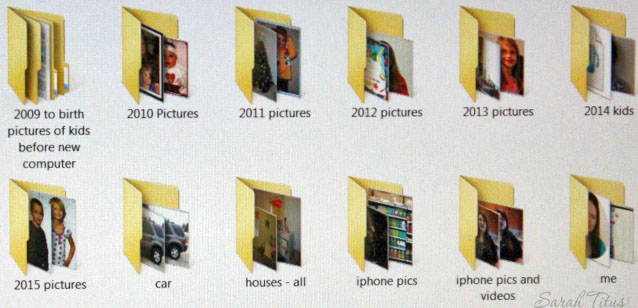
Then inside that folder, I have folders by the year for all my kids pictures. So, that I can quickly know where to find pictures, based on their ages. Inside those folders, you could even sort by child. So, one folder could be one of your kids, another folder for another one of your kids and then inside those folders, make them organized by date.
For me, I just keep the structure a little simpler, especially since a lot of my pictures, both my kids are in it. I place them by what they are and by date. So “kids at school 6-4-14” I know is of my kids at school on that particular date. Not only having the date, but also putting what activity is going on, really seems to help me locate things faster. Especially if I’m looking for something, I can just use the search function in the start button on Windows and search “kids at school” and the folder will pop up.
Make sure to name your images or your folders something easy to remember so you can recall them if you need to. Stay away from generic names like “birthday” or “picnic.” Try to be more specific. Who’s birthday? Where was the picnic?
In the same way that you don’t want to just have your pictures saved on your digital device, you also don’t want to rely solely on just your computer as it can crash as well. You can store photo’s on sites like PhotoBucket, save them safely on a USB drive (this one is currently $12.99 on Amazon), or on another computer. I like to save mine on my laptop as well as a USB drive, so that I have the pictures in 3 separate places.
Another place you could save them is to your email address. Simply make a folder in your email titled, “Pictures” and upload the photo’s and send an email to yourself. I do this will all my renter’s insurance pictures, so that if my house burns down or something and everything is gone, I can still access my email from any computer.
Related: Organizing your home can be so difficult. You have no idea where to begin or how to organize your home in a way that makes sense. This organizing essentials guide is the perfect solution. With real life advice, this go-to guide covers almost everything you own! Get started now and say goodbye to clutter forever!
How do you organize your photos? Have you thought of putting them in separate folders before? What’s your best organizing photos tip?
