I used to sell on Amazon and make pretty decent money. Most all my ebooks were on Amazon’s #1 Best Sellers list. I really did quite well on Amazon.
But there’s just one problem.
There’s no form or way to collect email addresses of people who have purchased from you.
And let’s get one thing cleared up, people who have ALREADY purchased from you, are a gazillion times more likely to buy something from you again!
Think about it…
They see your stuff, they know it’s good, they went through the buying process, they know what to expect, they feel comfortable, you have their trust.
Bada-bing-bada-boom.
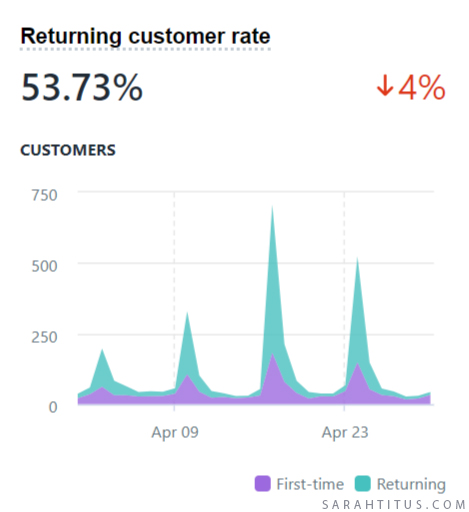
In my Shopify store, at the time I’m writing this, last month my returning customer rate is 53.73%!
That’s over HALF my customers.
Isn’t that beautiful? Oh, how I love having my own Shopify store!
The question then becomes, how do you capitalize on previous sales? How to you get those emails on your list?
Very SIMPLE! You just need to link your email list provider to your store, and today I am going to teach you how to link ConvertKit to Shopify.
How to Link ConvertKit to Shopify Integration
Building your email list is vital to your business. Here’s how to set that up…
Step 1:
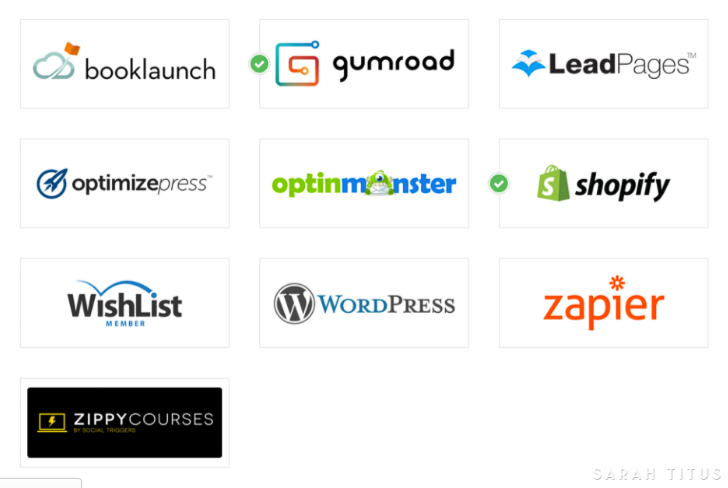
Login to your ConvertKit account and once inside, go to Automations > Integrations. Once you’re there go ahead and select Shopify.
Step 2:
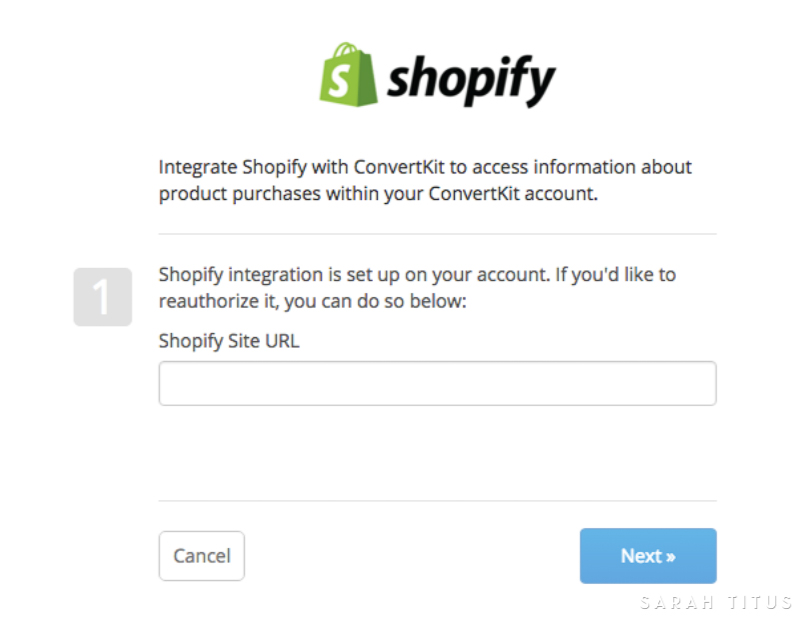
You will be redirected to a page that will ask for your Shopify URL. Once you’re there, go ahead a type your Shopify Store link and click on the Next button.
Step 3:
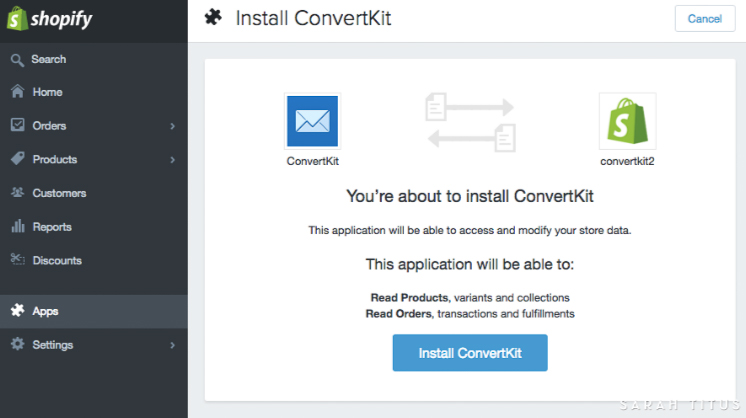
After clicking next, an authentication popup will appear and will give you the option to install ConvertKit in your Shopify Store. Go ahead and select “Install ConvertKit”.
Step 4:
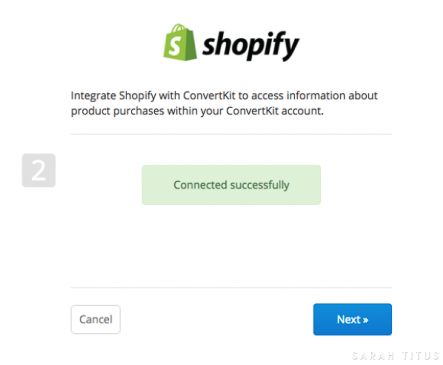
The pop up will close and you will have a screen with a green button indicating that you’ve connected Shopify and ConverKit successfully. Go ahead and click the next button again.
Step 5:
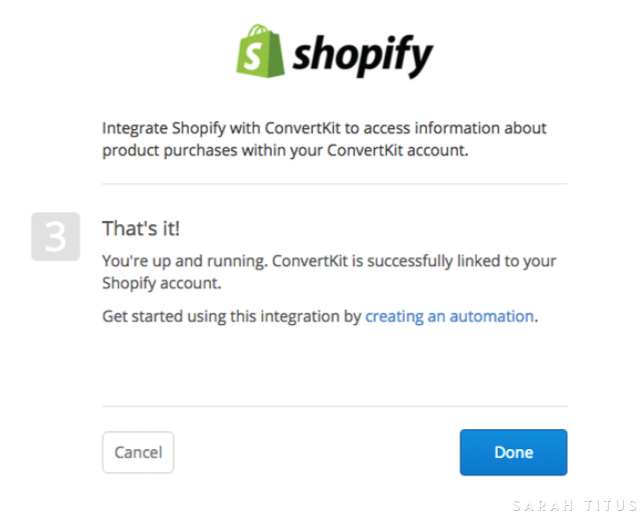
Now that Shopify and ConvertKit are connected. You need to create an automation. Why? That will tell your ConvertKit when to collect the emails. So go ahead and click the link that says “creating an automation”.
Step 6:
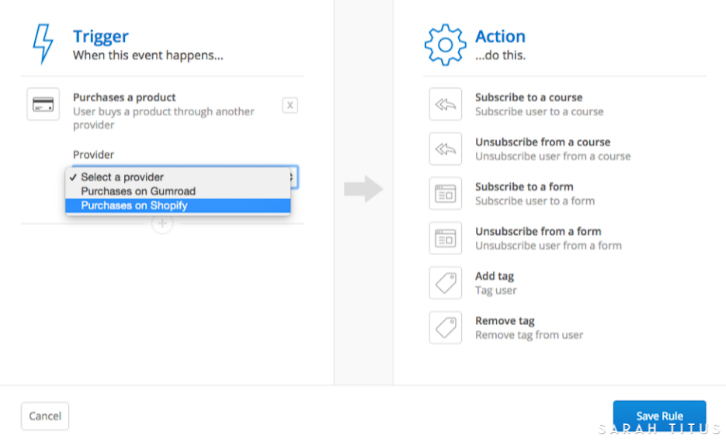
Now you’ll want to actually do something with this new ability to talk to Shopify. To do that, create an automation rule. That’s under Automations > New Rule if you need to find it again. Then select “Purchases a product” and then “Purchases on Shopify” for the trigger. Then you’ll have a list of all your Shopify products to select from.
Step 7:
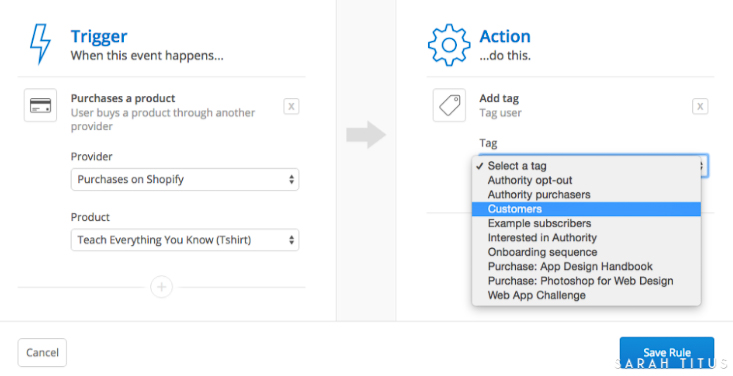
Next, you need to select an action. That could be to add a tag (shown below), subscribe to a sequence, etc. I add my customers to a tag I set up called Shopify Purchases and I also have them go into my main sequence so they start receiving emails from me right away.
That’s it!!
You have new purchases in Shopify getting tagged in ConvertKit so they are officially on your email list!
Once you have Shopify and ConvertKit linked, ConvertKit will automatically add a few tags you should be aware of.
- GDPR: Advertising Consent. This is for those who, while going through checkout, agree to receive marketing emails.
- GDPR: Email Consent. This is for those who, while going through checkout, agree to receive emails.
- Shopify: No Marketing. These are people who do not wish to receive any marketing or emails from you. So, be SURE when you are sending out emails to your list, you do not include that tag!
BE CAREFUL!!! If you’re like me and want to save money, all the email addresses that ConvertKit adds to your list, such as the Shopify: No Marketing tag, you get charged for! If you go over your limit and up to a new threshold in ConvertKit because of people you can’t even legally email, it sucks. It’s a waste of money to pay for email addresses you can’t email. So be sure to routinely DELETE those emails out of that tag. It’s a hassle for sure and I’m hoping ConvertKit changes that soon!
