Welcome to the Organizing Secrets: 30 Days to a Better Life Series.
You all know how much I ADORE Pinterest. Seriously, love that platform, but here’s what you may NOT know…the topic that I rank on, on Pinterest, is not saving money (what I built this blog on when I first started blogging), it’s not on making money from home (what I do now and am passionate about), it’s not on recipes or kids or anything like that, it’s on Organization!
Believe it or not, Pinterest (where I get a majority of my traffic from) sees me as THE authority on Organization! You could say I’m the Marie Kondo of Pinterest! 🙂 Maybe it’s because I have a ton of really good organizational posts with room organization ideas written by a complete organizational freak, I haven’t the foggiest idea, but organization is what Pinterest sees me as the authority on.
If you want to grow your Pinterest account, find out what you rank on, create a Pinterest board on it, and post more on that topic…easy enough, right?!
In keeping with my organizational ways, I’m so excited to create a home organization tips series for you. You’re going to love it. If you want to organize your home, this is where you can learn all the ins and outs of doing just that.
This series will not only encourage you, but give you practical steps to step up your organizational skills.
Organizing Secrets: 30 Days to a Better Life
If you’re looking to organize your home, here’s a 110+ page Household Binder you can download to help!
Day 1: How to Start Decluttering
Day 2: Organizing Principles Everyone Needs to Know
Day 3: Organizing Your Laundry Room
Laundry is a task you do so often, so a well organized, functional, and most importantly, safe laundry room will make your life much easier. No more rummaging through stuffed cupboards or knocking over half-closed bottles of detergent!
The first thing you’ll want to do is take account of all your items and categorize them (detergent, special treatment products, softener, dryer sheets, etc). Then make sure to take stock of anything that needs put in the trash or cleaned up. For storage solutions, opaque storage bins with handles are a perfect option because they are durable, can be wiped down with ease, easy to access and return to a higher shelf, and if they aren’t in a cupboard, they help keep the cleaning supplies out of sight and safe from kids’ prying eyes.
Clear jars or canisters are best used for items that aren’t a safety hazard for inquisitive kids. Any cleaning product item, such as liquid laundry tabs, should be stored in the original packaging with the safety instructions intact.
The final touch is adding clear labelling to help maintain order and help you find what you need at a glance. You’ll also want to ensure any cupboards have appropriate safety locks and straps if you have kids in the home.
Day 4: Organizing Tips That Will Change Your Clutter
Day 5: Organizing with a Messy Family
Day 6: Organizing Your Jewelry Collection
Sorting through and organizing your jewelry collection is definitely a project worth doing. Just think of the reward of never having to fight with a tangled necklace ever again!
The first thing you’ll want to do is gather all your jewelry items in one spot and group them into jewelry types (example: earrings, necklaces, rings, bangles/bracelets etc.) Depending on the size of your collection, you may want to categorize further with sub-categories, such as gold rings together and silver rings together, or dangly earrings separate from stud type earrings etc.
You’ll then want to remove any items you don’t like or never wear. Donate them or give some to family/friends. Make sure to get any broken items fixed (if possible) and clean any items that need it before storing them.
Next, decide where and how you want to store/display your jewelry. Velvet-lined compartment trays for a drawer are perfect to keep your items separated and protected. Plastic type trays are more suited for any of your costume jewelry. For countertop storage, it’s best to make use of vertical space with stackable organizers or hanging organizers. It’s also worth having a little tray or plate on your bedside table so that you can have a safe place to put the jewelry you wear and take off regularly.
Another great idea is using a mirror jewelry organizer. This is what I have and LOVE it! My daughter uses this one in her closet and likes it! Both really great options and space saving too!
Day 7: Organizing Your Playroom
Day 8: Organize Your Home on Less
Day 9: Organizing a Recycling System
We all know how important recycling is for the planet, but let’s face it, without a functional system, we can find ourselves putting recyclable items in the trash without realizing it! Having an organized, intuitive, and functional recycling system at home will help keep your whole family on track and the environment will thank you for it! 😉
You’ll want to have your recycling separated into two categories: store drop-off and curbside. Have a separate bin for each and label them clearly to avoid any confusion. Although recycling doesn’t contain food like a trash bin that needs a lid/cover, it’s still better and neater to have recycling bins with lids/covers that are easy to open/close.
It’s also super helpful to use recycling storage bins with handles since you will be moving them often. If you are limited on space, consider storage that can be mounted to the wall and removed easily whenever it’s time to empty them. And don’t forget to have the recycling storage easily accessible to ensure that recycling is as easy as possible for you and your family.
Day 10: Organizing Photos
Day 11: Organizing Photos on Your Computer
Day 12: Organizing Your Beauty Products
No one likes the frustration of having to rummage around in an overflowing makeup bag or a drawer crammed full of beauty products, some of which you never use and some that are long out of date! Organizing your beauty products into a functional system will streamline your beauty routines and save you much needed time and space.
The first step is to collect all your beauty items in a big pile in front of you and group them into categories. For example, group all your morning skincare routine items together, all your makeup items, your night time skincare routines items and so on. Next, make sure you get rid of any items that are old and any items that you never use. Be mindful that any items you keep will take up valuable space, so be ruthless and only keep the items you will REALLY use.
Now that your collection is more manageable and only contains the items you use regularly, you can make use of drawer dividers, storage bins, drawer organizers, tiered turntables, trays and labels. Just whatever storage solutions make sense for you and the space you have, making sure that everything is clear and easily accessible.
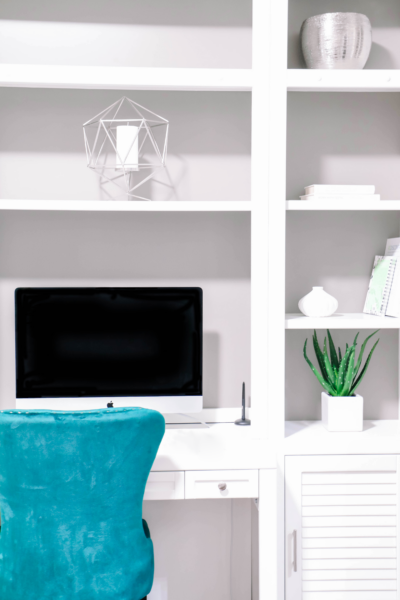
Day 13: Organizing Your Home Office
Day 14: Organizing with a Pack Rat Spouse
Day 15: Organizing Your Snack Cupboard
Snack cupboards can get messy real fast if there’s no organizational system in place. Taking the time to arrange and organize your snacks properly will allow you to see what you have at a glance and allows you to grab and go when you are hangry!
The first thing you’ll want to do is remove your snacks from boxes and bags. Next, you’ll want to put your snacks into categories (chips, granola bars, chocolate bars, sweets, nuts, etc.) Now put each type of snack in their own storage bin, canister, or jars and label them clearly. As you and your family start to munch through your snacks, you’ll be able to easily keep stock of what you’ve got and replenish items when needed.
If you’re pushed for space, you may want to use shoe organizers as snack storage on the back of a cupboard/cabinet door. Making use of vertical space with hanging storage rails and clips or tiered storage shelves is a great idea too!
Day 16: Organizing Your Purse
Day 17: Organizing Paperwork
Day 18: Organizing Your Linen Cupboard
We all gather tons of towels and duvet sets over the years, so our linen cupboards can get cluttered and messy real easy! Never have mismatched bedding or lost pillow cases again if you take a little time to organize your linen cupboard.
First, take stock of everything you have and put the items in categories such as duvet set sizes (double, single etc.), guest towels, every day towels, and so on. If you have the space to have a shelf for each category, great! If not, you can use baskets or storage boxes for each of the different types of items, with clear labelling.
To make sure each of your duvet sets stay together, it’s a great idea to put the duvet sheet and pillow case folded inside the matching pillow case. That means you can quickly grab a fresh set when needed, without having to hunt for a rogue pillow case. #smart
Day 19: Organizing Emails
Day 20: Decluttering Your Home the Easy Way
Day 21: Organize Your Cleaning Routine with Door Storage
Door storage is an excellent way to simplify your cleaning routine and save precious space in your cupboards. You can store the items you use most often on the door, as well as any long or awkward items that usually hit you on the head or fall out when you open a cupboard!
It saves you time wading through a jam-packed cleaning cupboard and knocking supplies everywhere. For your functional door or wall storage, I’d recommend broom grippers (here’s one I just bought and am going to install), hooks for your cleaning cloths/duster and spray bottle hangers.
Day 22: Organizing a Small Apartment
Day 23: Organizing Your Garage
Day 24: Organizing Keepsake School Work, Art & Projects
Kids are always bringing home piles of paper from school adorned with their hard work, but let’s face it, we aren’t going to want to keep it all. If you have a handy organizational system in place, it’ll stop you shoving the papers to one side each day, which soon turns into a mountain of paperwork to deal with.
Any doodles that are half finished, can really just be put straight into the recycling bin. Any worksheets that have positive comments from the teacher or achievement stickers etc., are ones worth setting aside to keep. When it comes to artwork and projects, it’s nice to hold on to those that are personalized (ones with handprints, portraits, projects on specific holidays, etc.) and ones that you really like and find special for whatever reason.
Have stackable sentimental school storage boxes for each child and label them clearly with the name and school year. You’ll want to keep the current boxes accessible as you’ll be adding to it on a daily/weekly basis no doubt! At the end of each school year, go through the box and purge anything that you kept but have decided isn’t really worth keeping.
If you are limited for space or can’t seem to part with anything your child creates, it may be better for you to take photos of everything your child brings home and store it digitally. You can then make a photo book of their work in the future if you want!
Day 25: Organizing Your Bedroom
Day 26: Organizing Your Closet
Day 27: Organizing Your Living Room
Now we get to the main room in the house, right? The room where everyone seems to come in and be comfy (not necessarily a bad thing) by taking off shoes, throwing their bags and books on the coffee table, and maybe even some laundry.
How do you fix this?
Fortunately, by going through the other days of decluttering, most of these things will have a place. For example…
- kids’ book bags can go in the front closet or in a cubby if you have an entry room/cabinet
- blankets you have left after getting rid of can be folded and put in a closet or basket
- shoes can go on the shoe rack
Try and keep everyone in the habit of putting those things where they go so you can truly relax and enjoy clutter-free time together as a family.
Day 28: Organizing Your Kitchen
Day 29: Organization for the New Year
Day 30: Decluttering Kids Room
