Once you open your Shopify store (you can see the tutorial here), you’ll need to know how to get around within the site and start customizing certain things.
It takes quite a bit of time for beginners to figure out where to find things and this Shopify guide is designed to help you locate things quickly and efficiently, thus saving you weeks of setting things up because you can’t find the options or don’t know they even exist.
Shopify Guide
After you sign up for a Shopify account, the first thing you’ll see is your back office homepage.
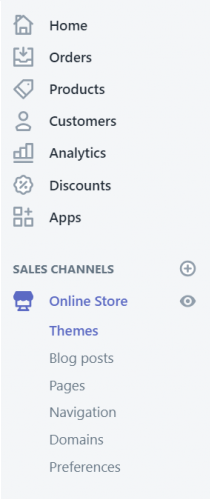
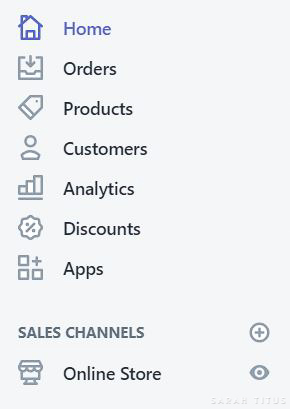
The first thing you’ll want to click is, “Online Store” under “Sales Channels”.
When you do, new navigation links will pop up.
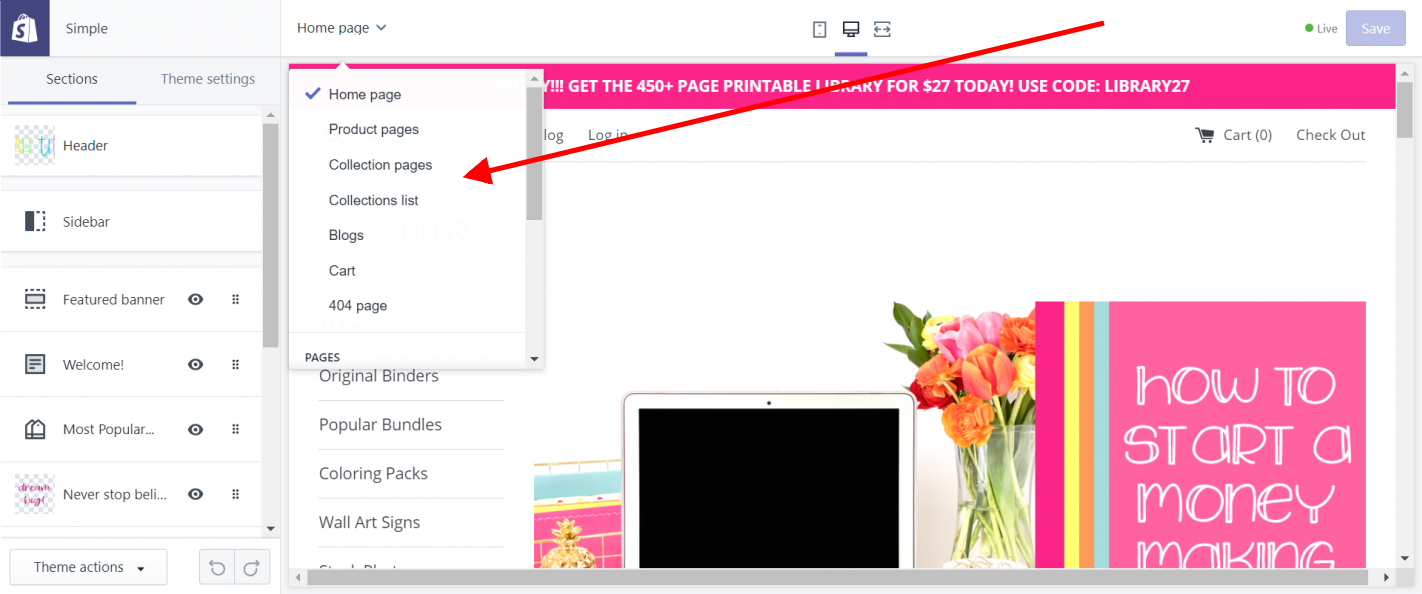
Shopify Themes: This is where you change/update the theme of your ecommerce store. If you click on this themes button and then “Customize” in the blue button on the right side of the page, you’ll see TONS of options to customize your theme and make it just how you want it to be.
Just kinda play around in the sections and see what you can change to make it all your own.
Pro-tip: You can change more things if you select the toggle from the “Home page” panel.
That’s where you can do more advanced settings, like how things show up on your product pages or collections list. This is really great because you want to customize every aspect of your Shopify store to make it look completely UNIQUE and DIFFERENT from everyone ELSE’S Shopify site!!!!
Blog Posts: You’ll go here if you want to create blog posts in your Shopify store. I don’t personally create blog posts because I have a pre-exisiting blog (https://www.SarahTitus.com), but if you wanted a blog on your Shopify store, you could add in blog posts there.
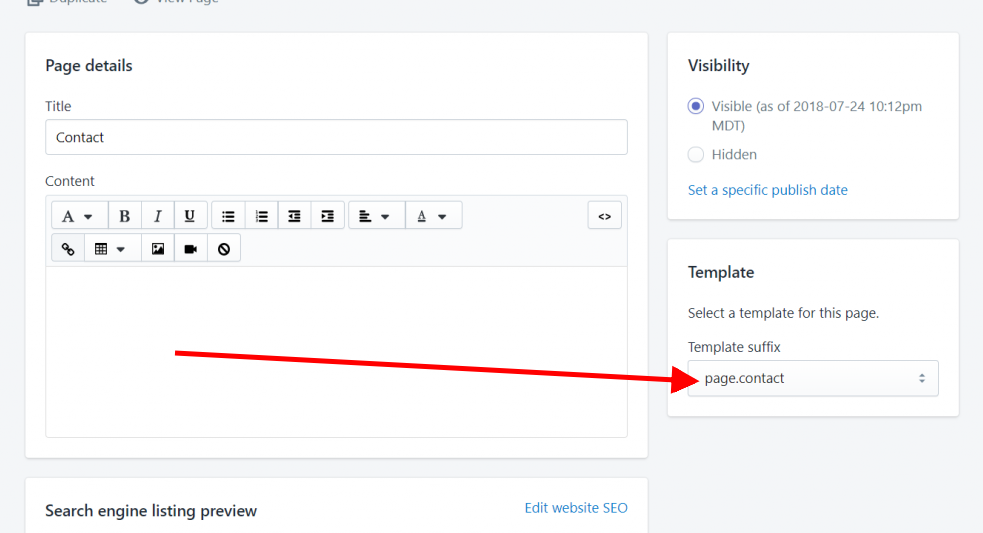
Pages: This is where you’ll go to create pages. You use the pages to put the links in your footer bar and various other places. So, let’s say you wanted a link in your footer bar that says, “Contact Me.” You’d set up a contact me page here and select “page.contact” from the Template section.
If it’s just a regular page, just leave the Template at the default setting, “page”.
Then you’d go to navigation and create a footer navigation and put in the Contact Me page you just set up (see screenshot below).
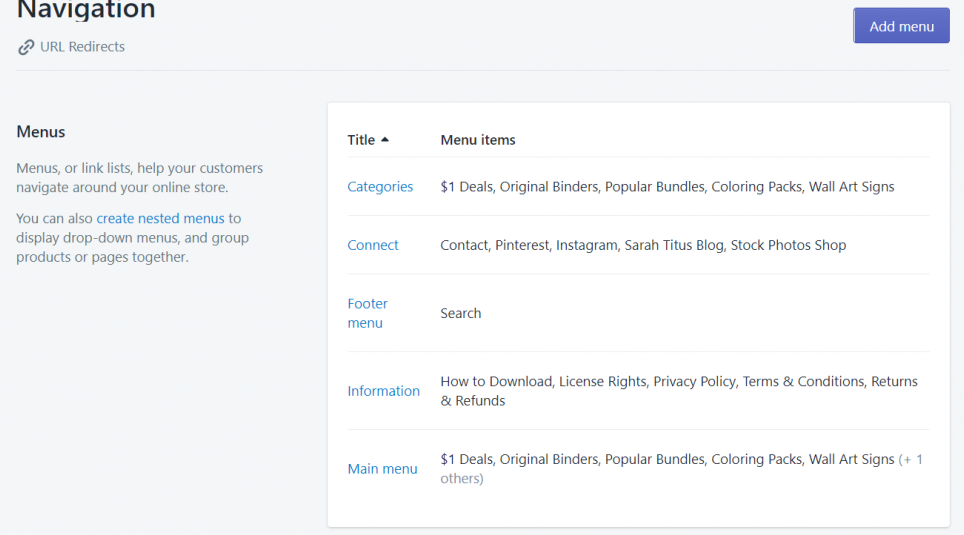
Navigation: This is where your site navigation will be located. Here’s how mine looks:
As you can see, I have categories set up (that’s in my footer), Connect (also in my footer), Information (in my footer), and my Main Menu (my sidebar). The “Footer menu” says search. That’s just something in there that I chose to disable so it doesn’t show up on my Shopify site, but in that section it shows up.
You want to name your sidebar navigation, “Main Menu” and then add in the categories you want to appear in your sidebar.
For your footer, most of those are pages I created as well as a few links. It looks more professional to set up a footer with links, so I would suggest doing that.
Pro-tip: Don’t copy/paste what I have set up in my store. The last thing you wanna do is look like a copycat. You want your store to be all your own, with your own ideas and content in it!
Domains: Not something that I really use for anything
Preferences: This is where you can set the name of your site and meta description, along with adding in your Google Analytics code so it’ll track in Google Analytics. If your shop is new and not ready yet for the world, you can add your password in here, so that a few people can see it (ones you give the password to), but no one can access it without the password.
Next, on the screenshot below, you will see a panel, this is where you manage all of your store. It’s so easy. Let’s take a look at it.
Home: Here you’ll be able to see how your store is doing at a glance, and what is happening right at that moment. You will see how many visitors there are live on your site, the orders of the day, etc. This is my favorite part because at a very quick glance, I can see how much I’ve made for the day, how much my traffic is at, and how many people are on the site.
It will also show you how your abandoned cart feature is working (if you’re on the $79/month plan and have it set up).
There are tons of useful analytics and tracking things on this page. Things like:
- who your best customer is (who buys the most)
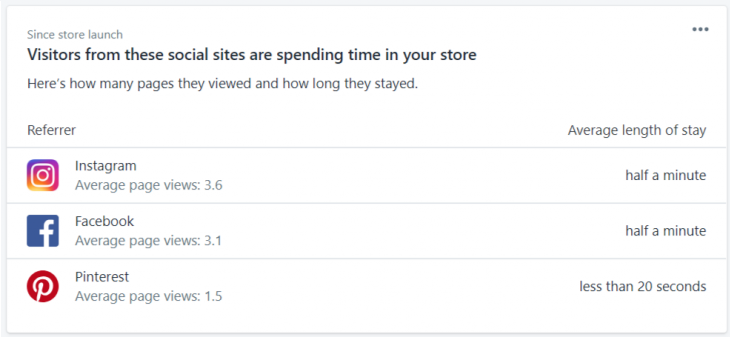
- conversion rates for social media (screenshot below)
- products that were added to the cart most often
- products that were viewed more often
- how long people stay on your site who come from specific social media avenues
- what your busiest time is of the day (traffic wise)
- …and so much more.
This is all incredibly valuable information because like looking at my card for conversion rates on social media, I know that Instagram is my best source for traffic and that’s where I should spend more of my marketing efforts on. They are looking at 3.6 pages each person and spending half a minute there, which is pretty good for social media. Whereas my Pinterest is less than 20 seconds and only 1.5 average pageviews per person, so I wouldn’t want to spend the bulk of my marketing efforts on Pinterest. It would be on Instagram, then Facebook. I wouldn’t even worry about Pinterest right now.
Everyone’s card will be different and you can make decisions based on what’s right for you and your store.
Shopify is always changing out this home section with new information, so what you see today, may not be the same things you see tomorrow. So be sure to always check out that page routinely to see what’s up in your store.
Orders: This will allow you to track all your orders. It’s very much needed to maintain your store. Sometimes a customer will email in and you’ll need to look up their order.
Sometimes you’ll create a free order for a friend, you can do that in there as well. Every day, I go in this section and look at every single order that is over $10. I will look and see what my customers are purchasing, so I know what is “hot” right now. I keep a super close eye on this section at all times.
Products: This is where you can see all of your products at a quick glance. You can also add a new product from here.
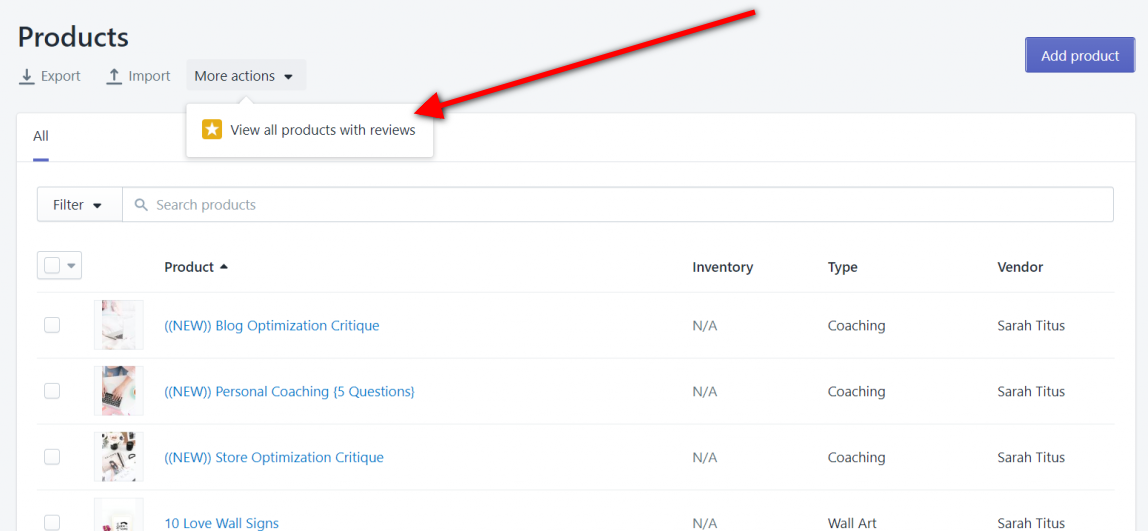
Something really cool about this section. If you click the toggle bar, More actions, and then select “View all products with reviews” you can see all your products that have reviews on them.
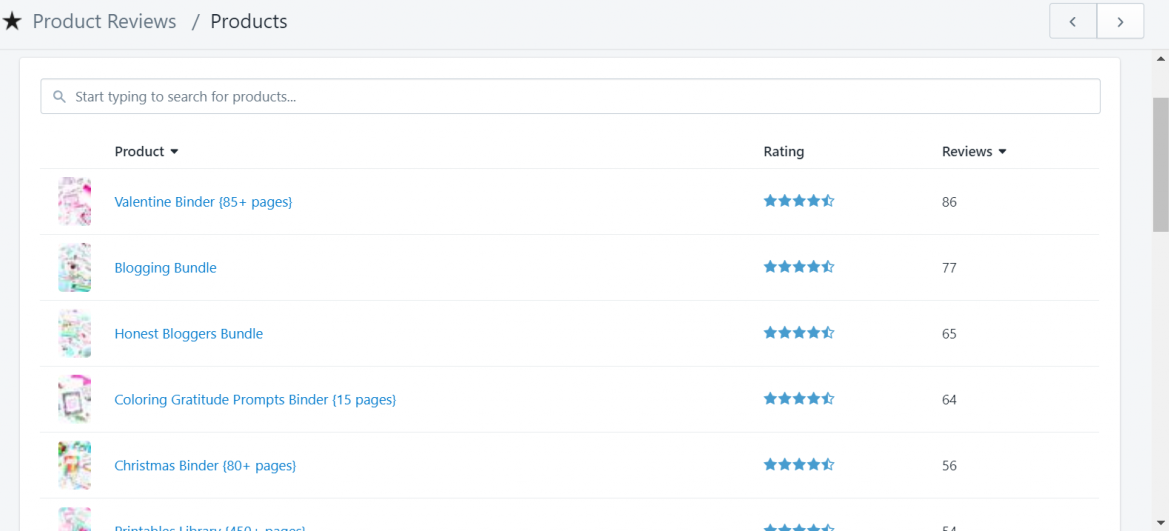
Once there, select “Reviews” in the top right and it’ll populate the list by greatest to smallest.
This is also very helpful because then you can see which items your audience is liking the most. 🙂
Customers: This is really great because you can go in and see the history of your customers purchases by name. So you just type in an email address or a name and it’ll show you their state/country, how many orders they’ve made, and the dollar amount they’ve spent.
Analytics: This will help you to keep track of your store. This is just as important as having Google Analytics installed on your blog. On this page, you’ll be able to see your conversion rate, and pretty much anything that’s important for you to make decisions when it comes to creating new products.
Be sure to spend LOTS and LOTS of time in your analytics, ESPECIALLY if you are on the $79/month plan as your analytics are much, much better than on the $29/month plan.
Discounts: People love shopping when they are offered a discount. On this page, you can create discounts for your audience. This is a great way to boost your sales and have people buying more because their money goes further.
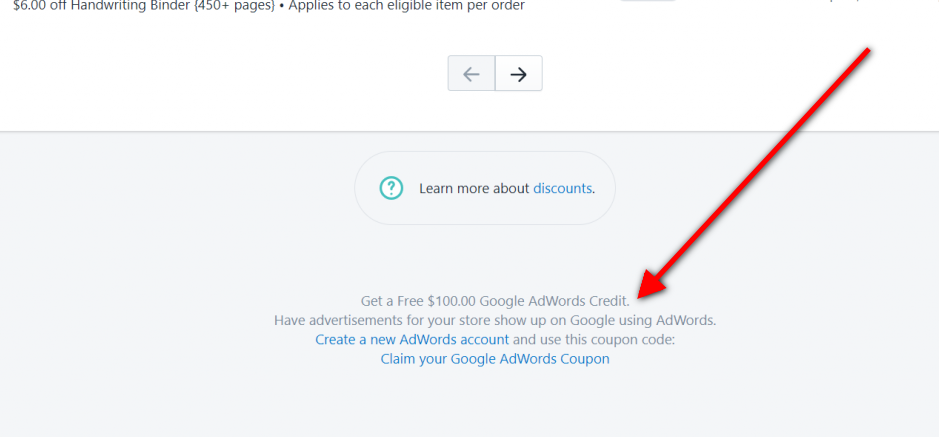
Pro-tip: At the very bottom of this page, you’ll see a special discount for YOU. It’s a $100 free Google AdWords Credit! I’ve never used my credit in either store, but this is something you should DEFINITELY do as it’s free advertising to your store. 🙂
Shopify Apps: Very important! Just like phone apps, or plugins on your website, the apps in Shopify will help you to customize your store and make it more efficient! I’m currently working on a Shopify bundle and all the apps that I use will be shared in the bundle, so be sure to look for that upcoming Shopify training resource!
As you can see the Shopify platform is very intuitive and incredibly easy to set up and use. I hope this short Shopify guide tutorial was helpful! 🙂
